How to Access Your NAS Remotely – Family Setup Guide (QuickConnect, Tailscale, VPN)
How to access your NAS remotely: a family‑first decision guide — no networking degree required.
A family-first decision guide — no networking degree required.
TL;DR: How to Access Your NAS Remotely Without Making a Security Mistake
- ✅ Yes, you can access your NAS from anywhere — from your phone on vacation to your laptop at the office.
- 🔒 3 safe methods covered here: Synology QuickConnect (easiest), Tailscale (best privacy), and NordVPN Meshnet (most familiar for families).
- ⚡ No port forwarding needed — all 3 methods work without touching your router settings.
- 👨👩👧 Best for families: QuickConnect for grandma’s tablet; NordVPN Meshnet if you already subscribe to NordVPN.
- 🛡️ Remote access is safe when done right — skip the methods that expose your NAS directly to the internet.
Ever been on vacation, reached for your phone to show off family photos stored on your home NAS — and realized you had no idea how to actually get to them from the road? You are not alone. Remote access to a home NAS sounds straightforward until you start searching and land on forums full of terms like port forwarding, DDNS, and reverse proxy. Suddenly a simple question feels like a networking exam.
Here is the good news: most families do not need to touch any of that. In 2026, there are beginner-friendly ways to access your NAS remotely that are both simple and genuinely safe — and this guide will show you how to access your NAS remotely without the jargon wall.
By the end, you will know exactly which method fits your family’s situation, what security steps to take before you enable anything, and which mistakes to avoid. Whether you are reaching vacation photos, tax documents, or shared folders from work, you will have a clear path forward.
📦 Starting from scratch? Before choosing a remote access method, make sure you have the right NAS for your family. The Synology DS224+ is our top beginner pick — check current price before you dive into setup.
HomeCloudHQ earns a small commission if you buy through our links — at no extra cost to you.
Not sure which NAS to buy yet? Start with our NAS for families buying guide to make sure you have the right hardware before spending time on a remote access setup.
Is it safe to access your NAS remotely from outside your home?
The short answer for beginners
Yes — with the right setup. Remote access to a home NAS is a completely normal and well-supported feature. Millions of families use it every day to view photos, access documents, and share files with each other while away from home.
The key word is setup. Safe remote access depends on how you connect, not simply the act of connecting itself.
The main risk is exposing services directly to the internet
When a device is visible on the open internet — meaning anyone in the world can attempt to connect to it — it becomes a target. Automated scripts constantly scan for exposed home devices and probe for known vulnerabilities, especially on popular NAS brands.
That does not mean your NAS becomes a hacker magnet the moment you enable remote access. It means the method you choose matters enormously. The safer methods in this guide keep your NAS invisible to the public internet while still letting your approved devices reach it cleanly.
⚠️ Security Note: Remote access is not the problem. Unsafe remote access is. The goal is connecting your approved devices to your NAS — not opening your NAS to everyone. Choose a method that minimizes public exposure. See our NAS security checklist for families for a full hardening walkthrough.
Do you need port forwarding to access your NAS remotely?
📖 Jargon Box — Port Forwarding: Port forwarding is a router setting that opens a direct path from the internet to a specific device inside your home network. Think of it like creating a side door into your house and hoping only the right people find it. It works — but if misconfigured, it increases your exposure to anyone probing the internet for unlocked doors.
When port forwarding is avoidable
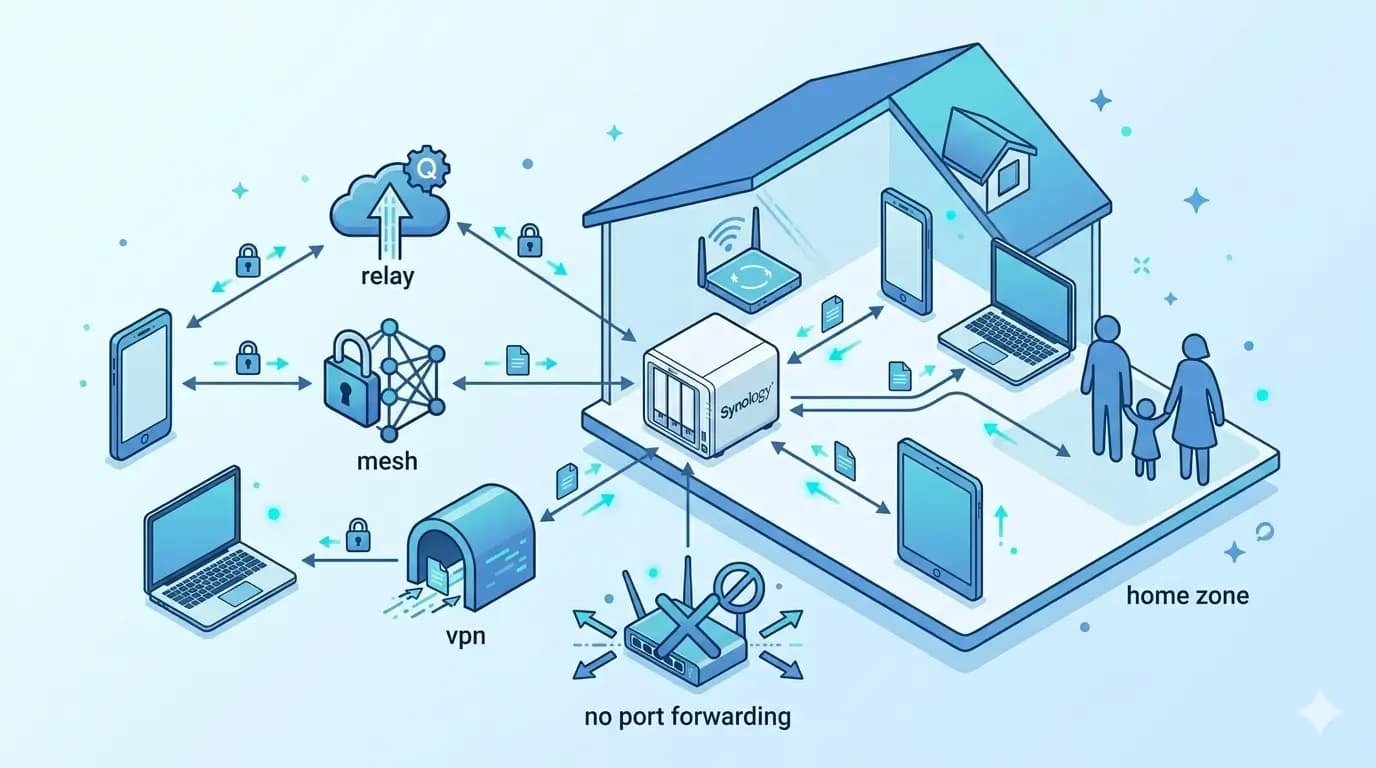
In most family use cases, port forwarding is completely avoidable. Modern NAS devices from Synology, QNAP, and others include vendor-managed relay tools that route your connection through the brand’s own servers — no router changes required. Private mesh tools like Tailscale also bypass port forwarding entirely by creating a direct, encrypted tunnel between your specific devices.
Why beginners should not start with exposed ports
Port forwarding requires you to know which ports to open, how to secure those services, and how to monitor for intrusion attempts afterward. A single misconfiguration — like accidentally exposing your NAS admin panel — can give an attacker a direct path to your entire device.
For families who want a straightforward experience, the vendor relay and private mesh options below are safer, faster starting points. You can always learn port forwarding later if a specific need arises and you feel confident in security hardening.
💬 Quick Answer: Most beginners do not need port forwarding to access a NAS remotely. In most cases, a vendor relay service, Tailscale-style private network, or a properly configured VPN gives safer remote access with less risk. Port forwarding can work, but it raises the chance of misconfiguration and is not the simplest family-first option.
What is the easiest way to access your NAS remotely?
There are three main approaches families use. Each has different trade-offs in ease, security, and flexibility. Here is what each one means in plain English — no router manual required.

Method 1 — Vendor remote access tools (e.g., Synology QuickConnect)
Most NAS brands offer a built-in remote access service. Synology calls theirs QuickConnect. You create a free account with the vendor, enable the feature in your NAS dashboard, and the vendor’s servers act as a relay between your phone and your NAS. No router settings, no static IP address, no advanced configuration.
This is the easiest method and the one most families should start with. The trade-off is that your traffic passes through the vendor’s relay infrastructure, which adds a small speed overhead and requires trusting that company’s servers with your connection. For family photos and everyday file access, this is a very acceptable trade.
Method 2 — Tailscale or mesh-style private access
📖 Jargon Box — Mesh Network: A mesh VPN connects your approved devices directly to each other over a private encrypted network, without exposing anything to the public internet. Think of it like giving your family members private invitations to a hidden room — only the people on the list can enter, and strangers do not even see the door.
Tailscale is a free tool (for personal use) that creates a private network between your approved devices. Install it on your NAS and on your phone or laptop, log in with the same account, and your devices can communicate as if they were on the same home Wi-Fi — even from another country. Your NAS never appears on the public internet at all.
This is the safest method for most families. The setup involves installing one package on your NAS and one app on your devices, then signing in. It is more hands-on than QuickConnect but still manageable for a patient beginner. The official Tailscale integration guide for Synology walks through the full process step by step.
Method 3 — Traditional VPN access
📖 Jargon Box — VPN (Virtual Private Network): A VPN creates an encrypted tunnel between your device and another network. When you use a VPN to reach your NAS, your phone connects to your home network through that tunnel — like running a private cable from your phone back to your house, wherever you are in the world.
A VPN approach can mean running a VPN server directly on your NAS (using OpenVPN or WireGuard, both advanced options) or using a trusted consumer VPN service that supports home network routing. For families who already use and trust a VPN service, this path can be a natural fit.
If you want a familiar, guided experience rather than managing your own VPN server, NordVPN is a well-supported option for US families — and its Meshnet feature makes it especially useful for remote NAS access without touching your router.
Method 3: NordVPN Meshnet — the familiar VPN for families
You have probably already heard of NordVPN — it is one of the most recognized VPN names out there. But did you know it has a feature called Meshnet that turns your devices into a private network? Think of it as an invisible cable connecting your phone, your kids’ tablets, and your NAS — no matter where each device is in the world.
📖 Plain English: A regular VPN hides your browsing from your internet provider. Meshnet does something different: it creates a secure tunnel directly between your own devices. Your NAS at home, your phone at the office, your partner’s laptop on a work trip — all connected as if they were on the same Wi-Fi.
Who is NordVPN Meshnet best for?
Meshnet is a great fit if you:
- Already have a NordVPN subscription (Meshnet is included at no extra cost)
- Want one tool for both family privacy and remote NAS access
- Have family members who are not very tech-savvy — the NordVPN app is beginner-friendly and they likely already have it on their phones
- Feel nervous about Tailscale simply because it is a less familiar name
How to set up NordVPN Meshnet for your NAS — quick overview
- Install NordVPN on your NAS (or the router/device it is connected to) and on all family devices
- Enable the Meshnet feature inside the NordVPN app (Settings → Meshnet → Turn on)
- Invite family members to your Meshnet — they receive a simple email link, no tech knowledge needed
- Access your NAS using its Meshnet IP address, exactly like you would on your home Wi-Fi
⚠️ Honest Trade-Off: NordVPN Meshnet requires installing the NordVPN app on every device that needs access. For teenagers with their own phones, this is easy. For a guest or a family member who refuses to install anything? QuickConnect (Method 1) is simpler. And if transparency is your top priority, Tailscale uses an open-source protocol. But for most families who already trust the NordVPN brand, Meshnet is the sweet spot between ease and privacy.
📖 Want screenshots and exact settings for Synology? We have a full step-by-step tutorial ready: How to Set Up NordVPN Meshnet on Synology NAS (2026) →
🔒 Try NordVPN Meshnet — Included Free With Any NordVPN Plan
One subscription covers the whole family. Access your NAS securely from anywhere — no router changes, no tech headaches.
🛡️ Get NordVPN + Meshnet →HomeCloudHQ earns a small commission if you sign up through our link — at no extra cost to you.
Which remote access method is right for your family?
Not sure which method to pick? Here is the honest side-by-side. Think of this like choosing between the family minivan, the sports car, and the trusted SUV — they all get you there, but the right choice depends on who is driving.
| Method | Difficulty | Safety | Best For | Price | Setup Time |
|---|---|---|---|---|---|
| 🟢 Synology QuickConnect | ⭐ Very Easy | Good — traffic routes via Synology’s own relay servers | Total beginners; grandparents; kids’ tablets; Synology-only households | Free | ~5 min |
| 🔵 Tailscale | ⭐⭐ Moderate | Excellent — WireGuard encryption, NAS stays fully off the public internet | Security-conscious parents; UGREEN & non-Synology NAS; multi-device households | Free (up to 3 users) | ~15–20 min |
| 🟣 NordVPN Meshnet | ⭐⭐ Moderate | Very Good — encrypted private tunnel, trusted consumer brand | Families already using NordVPN; want one tool for privacy + NAS access | Included with NordVPN (~$4–5/mo) | ~20–30 min |
| ⚙️ Self-hosted VPN (OpenVPN/WireGuard) | ⭐⭐⭐ Advanced | Very good — full control, no third-party relay | Advanced users who want maximum independence | Free (runs on your NAS) | Several hours |
| ⚠️ Port Forwarding Only | ⭐⭐⭐ Advanced | Lower if misconfigured or left unmaintained | Users with a specific need and strong security knowledge | Free | Moderate — but error-prone for beginners |
🎯 Quick Pick: Just want the fastest setup? Go with QuickConnect. Worried about hackers and want the strongest encryption? Choose Tailscale. Already paying for NordVPN? Meshnet is already yours — just turn it on.
🔐 Already comfortable with VPNs? NordVPN is a beginner-friendly option for families who want guided, private remote access without managing their own VPN server. Meshnet is included free with any plan.
How to access your NAS remotely with the right method for your setup
Not every family has the same priorities or the same comfort level with technology. Use this decision path to find the method that fits your situation right now — you can always add layers later.
Choose this if you use Synology and want the easiest path
Enable QuickConnect in your Synology DSM control panel. Go to Control Panel → QuickConnect, create or log in with a free Synology account, and choose a personal ID. You will get a simple link like yourname.quickconnect.to that works from any browser or the official DS File and DS Photo apps on your phone. No router changes, no static IP, no technical knowledge required.
Choose this if you want private access without opening ports
Install Tailscale on your NAS and on every device that needs remote access. Both Synology DSM (via Package Center) and QNAP QTS support Tailscale as an installable package. Once connected, your devices reach the NAS directly by its private Tailscale IP address — no public exposure, no vendor relay in the middle. Your NAS is effectively invisible to anyone who is not on your approved Tailscale network.
Choose this if you already trust a VPN workflow
If your family already uses NordVPN, the Meshnet feature is already included in your subscription. It connects all your approved family devices into one private network — your NAS at home, your phone at work, your partner’s laptop on the road — without any router configuration. It is the most natural extension of a VPN workflow most families already have.
🗺️ Quick Decision Path — Find Your Starting Point
- ✅ If you are a complete beginner → Start with vendor relay access (QuickConnect on Synology, myQNAPcloud on QNAP). Fastest, simplest, zero router changes required.
- ✅ If security is your top concern → Use Tailscale. Your NAS stays invisible to the open internet. Free for personal use.
- ✅ If multiple family members need simple app-based access → Combine vendor relay for everyday photo and file browsing with Tailscale for accounts that need deeper access or higher privacy.
- ✅ If you already use NordVPN → Turn on Meshnet inside the NordVPN app. It is already paid for — no new tools needed. Get NordVPN →
- ✅ If you are an advanced user who wants full control → Self-hosted VPN (WireGuard on your NAS) gives you maximum flexibility and no third-party relay dependency, at the cost of more setup and maintenance.
How do Synology, Tailscale, and VPN-based setups compare for families?
Best for family photos
Synology QuickConnect paired with the DS Photo app offers the most polished remote photo experience. Thumbnails load quickly, albums are well-organized, and the interface is approachable for every family member — even the ones who struggle with technology. If your family’s primary goal is viewing and sharing memories remotely, this path provides the smoothest day-to-day experience.
If you have recently moved your library away from Google Photos, make sure your collection is well-organized on the NAS before enabling remote access. Our step-by-step Google Photos migration guide covers exactly how to do that cleanly.
Best for documents on the road
Tailscale is the stronger choice when you need to access work documents, tax files, or family records from a hotel or coffee shop. Because your NAS appears as a standard network drive through Tailscale, you can open files directly in desktop apps without downloading and re-uploading. It also handles intermittent connections well, which matters when traveling and switching between Wi-Fi and mobile data.
Best for shared access without admin headaches
All three methods support user accounts, but the key is creating separate, limited accounts for each family member rather than sharing one login — especially not the admin account. A spouse or teenager who only needs the shared photos folder should have access only to that folder, with their own credentials and their own 2FA setup.
⚠️ Security Note — Separate user accounts matter: Create a dedicated account for each family member with access only to the specific folders they need. If one account is ever compromised through a weak password or a shared device, the damage stays limited to that account’s permissions — not the entire NAS. See our NAS ransomware protection checklist for step-by-step user account hardening instructions.
What security steps should you take before enabling remote NAS access?
Before you flip any remote access switch, run through this checklist. These steps take less than an hour total and significantly reduce the risk of a bad outcome.
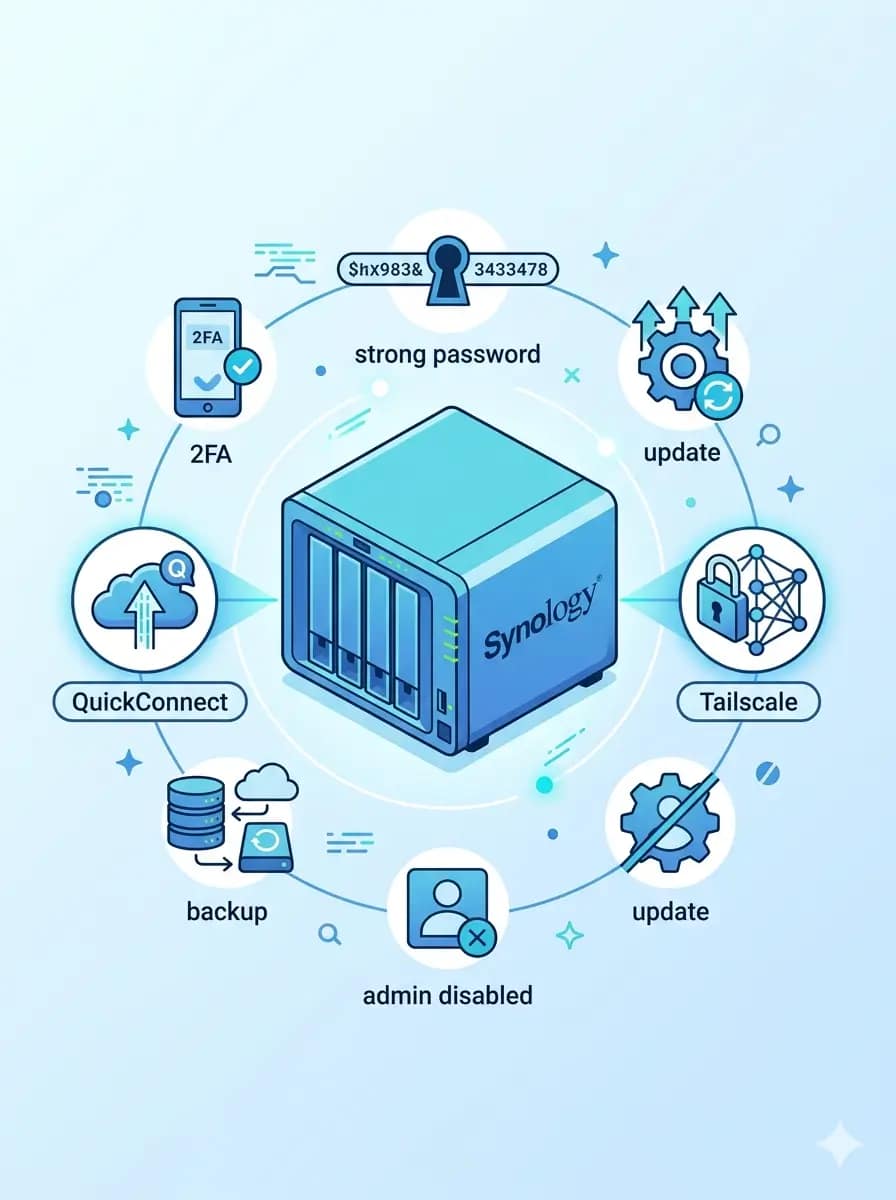
🛡️ Before you start — harden your NAS first: Enabling remote access increases your exposure surface. Make sure your NAS is locked down before opening it to the outside world. Read our complete NAS ransomware protection guide for families →
1. Turn on two-factor authentication
📖 Jargon Box — Two-Factor Authentication (2FA): 2FA adds a second verification step after your password — typically a short code generated by an app on your phone. Think of it as needing both your house key and a temporary door code. Even if an attacker guesses your password correctly, they still cannot get in without physically having your phone.
Enable 2FA on every account that has remote access enabled. On Synology DSM: Personal → Account → 2-Step Verification. On QNAP QTS: Users → Account Settings. Use an authenticator app (Google Authenticator, Authy) rather than SMS when possible — app-based codes are harder to intercept than text messages.
2. Use strong, unique passwords and a password manager
A weak or reused password on any NAS account is one of the most common entry points for unauthorized access. Every account on your NAS — especially the one used for remote login — should have a long, unique password that is not shared with any other service.
If your family does not already use a password manager, remote access setup is the right moment to start. NordPass is a beginner-friendly option that works across all devices your family uses — check their current plans for details on family sharing features.
3. Update your NAS firmware and all installed packages
Security vulnerabilities are discovered and patched regularly. Before enabling remote access, confirm your NAS is running the latest firmware version and all installed packages are up to date. On Synology: Control Panel → Update & Restore. On QNAP: App Center → Updates. Set update notifications on so you are alerted when new patches are available.
4. Limit and protect the admin account
Disable or rename the default “admin” account if your NAS supports it. Create a new administrator account with a non-obvious name, and use that for in-home management tasks only. The default “admin” username is the first target automated attack scripts try — removing it as an active login option eliminates an easy entry point for automated attacks. For everyday remote access, every family member should use their own limited, named account — not the admin.
5. Check that your backups are working before you enable access
Remote access and backups are two completely different things. Enabling remote access does not protect your files from accidental deletion, hardware failure, or ransomware. Before you open up remote connectivity, confirm that your NAS already backs up important files to an external drive or a cloud destination.
📖 Jargon Box — Reverse Proxy: A reverse proxy is an optional advanced layer you can place in front of your NAS that routes incoming traffic to the right app or service. Think of it like a building receptionist who decides which room each visitor can enter — and turns away anyone who is not on the list. It is a useful security tool, but it is not required for beginners. Vendor relay and mesh methods do not require you to set one up.
⚠️ Security Note — Remote access is not a backup plan: If your NAS is the only place your family photos exist, remote access just means you can watch your single copy of those memories from anywhere. That is not safety — that is convenience. Apply the 3-2-1 backup strategy before enabling anything: Backblaze’s plain-English breakdown of the 3-2-1 rule is one of the best starting points. Then see our NAS security checklist for families to make sure your backups survive even a worst-case scenario.
How do you access a Synology NAS remotely without being technical?
📖 Jargon Box — DSM (DiskStation Manager): DSM is Synology’s operating system — the main web-based dashboard you use to manage everything on your NAS: users, storage, apps, settings, and remote access. Think of it as the control panel of the whole device. You reach it by typing your NAS’s local IP address in a browser when you are at home, or through a remote access method when you are away.
Beginner-friendly path for Synology users
Start by logging into DSM from home. Go to Control Panel → QuickConnect, sign in with your free Synology account, and pick a unique QuickConnect ID. That ID becomes your personal remote address. On your phone, download DS File (for all files) or DS Photo (for photos only) from the App Store or Google Play, log in with your QuickConnect ID and your NAS credentials, and you are done.
The experience on mobile is intentionally simple. You browse folders, view photos, download documents — all from a clean app interface that does not require you to touch a single router setting. If you only need remote access to photos and shared family folders, QuickConnect plus the DS Photo app covers almost everything.
What to check in DSM before leaving home
Run through this short checklist before your next trip or before you rely on remote access from work:
- ✅ QuickConnect is enabled and your ID is saved in the app on your phone
- ✅ Your NAS user account has a strong, unique password
- ✅ Two-factor authentication is active on your login
- ✅ DSM and all packages are on the latest version
- ✅ You have tested the app once from home using your mobile data (not Wi-Fi) to confirm the remote connection actually works
- ✅ Backups are running and the last backup completed successfully
That last test — switching your phone to mobile data and logging in before you travel — is the step most people skip. Do it once and you will feel genuinely confident the connection works when you need it most.
Common mistakes that cause lockouts
The most common reason people cannot reach their NAS remotely is a changed home network. If your router reboots and your NAS gets a new internal IP address, and you have set up anything that depends on a fixed IP (like a bookmark to the local DSM panel), the old address breaks. QuickConnect avoids this problem entirely because it uses your QuickConnect ID, not an IP address.
Other common lockout triggers: forgetting your NAS account password when away from home (which is why a password manager matters — see the security section above), and running an outdated version of the DS File app that no longer connects properly to the latest DSM. Keeping both the NAS firmware and the mobile apps updated prevents most of these problems.
If you run into persistent Synology issues, Synology’s official support hub has model-specific documentation and an active community forum for troubleshooting steps.
Can you access your NAS remotely from your phone?
Yes — and for most families, the phone is the primary way remote access gets used day to day. Reaching photos from your iPhone at your parents’ house, downloading a document from your Android tablet at work, or showing a video to a friend from the road — all of this is well-supported by modern NAS apps.
What works well for family photo viewing
Photo viewing is where phone-based remote NAS access shines. Synology’s DS Photo app organizes your library by album, date, and person (if you have face recognition enabled) and streams previews quickly even on a typical mobile connection. QNAP’s QuMagie app offers a similar experience for QNAP users. You do not need to download each photo to view it — the app streams a compressed preview and only downloads the full file if you choose to save it locally.
If your family has thousands of photos that used to live in Google Photos, having those memories accessible remotely through a NAS app is one of the most satisfying moments of the whole NAS ownership experience. Our step-by-step Google Photos migration guide covers how to move your library cleanly so your remote mobile experience is as organized as possible.
What works better for file management
For documents, spreadsheets, and general file management, a laptop or tablet with a larger screen is more comfortable than a phone — but the phone works in a pinch. Synology DS File and QNAP’s File Station mobile app both support browsing folders, uploading photos directly from your camera roll, and downloading files for offline use. If you need to open and edit a file, you will want a real keyboard, but downloading or uploading works fine from a phone.
When mobile access becomes frustrating
Mobile remote access has one genuine limitation: slow upload speeds at home. Your remote access speed is constrained by the upload speed of your home internet connection — not your phone’s download speed. If your home internet upload is limited, large file transfers over remote access will feel slow regardless of which method you choose. This is a home ISP constraint, not a NAS or app limitation, and it affects all remote access methods equally.
What should families avoid when setting up remote NAS access?
Most remote access problems are preventable. These are the four most common mistakes that turn a straightforward setup into a stressful situation.
Reusing the admin account for remote login
The admin account holds full control of your NAS — all users, all files, all settings. Using it as your everyday remote login means a single compromised session gives an attacker complete access to everything on the device. Create a named personal account with only the permissions you need for remote access, and reserve the admin account for in-home management tasks only. Ideally, disable the default “admin” username entirely and replace it with an account name that is not publicly obvious.
Skipping firmware and app updates
Security patches for NAS operating systems are released regularly, often in response to discovered vulnerabilities. Skipping updates — especially on a device that is now accessible remotely — leaves known security holes open. Set your NAS to notify you when system and package updates are available, and apply critical security patches promptly.
Opening ports without understanding the trade-offs
Port forwarding is not inherently dangerous, but it requires ongoing maintenance: checking that exposed services are up to date, monitoring access logs for unusual attempts, and understanding what each open port actually does. Beginners who enable port forwarding for one feature and then forget about it end up with an unmaintained exposure point. If you are not ready to treat it as a responsibility, stick to vendor relay or mesh access until you are.
Assuming remote access replaces backups
Remote access means you can reach your files from anywhere. It does not mean your files are protected. If your NAS experiences a drive failure, ransomware, or accidental deletion of a shared folder, remote access does nothing to help you recover. Maintain independent backups — to an external drive and to an off-site or cloud destination — before and after enabling remote access. The Backblaze 3-2-1 backup rule is the clearest framework for home users.
Which setup should most beginners choose?
If you have read through all the options and still feel unsure, here is the simplest possible recommendation ladder. Start at the top and move down only if you need something the first option does not provide.
- Start with your vendor’s built-in relay access (QuickConnect for Synology, myQNAPcloud for QNAP). Enable it in your NAS dashboard, install the official app on your phone, and test it on mobile data before you travel. This covers the vast majority of family use cases with the least setup effort.
- Add Tailscale if you want your NAS completely off the public internet. You can run QuickConnect and Tailscale at the same time — they do not conflict. Use QuickConnect for everyday family photo access and Tailscale for private, secure file management from your work laptop.
- Add NordVPN Meshnet if you want one tool that covers your whole family’s privacy and NAS access. If you already subscribe to NordVPN, Meshnet is already included. It is the most natural upgrade for families who already live inside the NordVPN ecosystem.
The “start simple, upgrade later” approach works because none of these methods lock you in. You can enable QuickConnect today, add Tailscale next month, and revisit self-hosted VPN options in a year if your comfort level and needs have grown. You do not need to get everything perfect on day one.
Not sure you have the right NAS to support all of this? Our beginner-friendly NAS recommendations cover the hardware side — so you can make sure your device is a good fit before investing time in setup.
📦 Still choosing your first NAS? The Synology DS224+ is our top pick for beginner families — reliable, app-rich, and fully compatible with QuickConnect, Tailscale, and NordVPN Meshnet out of the box. Prices change often — check current price before buying.
If you want more room to grow your storage: the Synology DS923+ adds two more drive bays and handles heavier workloads without compromising ease of use — check current price for details.
Prefer a value-focused alternative? The QNAP TS-264 is a strong 2-bay option at a comparable price range — check current price before committing.
Frequently Asked Questions
💬 Quick Answer — Best method for most families: For most families, the best remote NAS method is the one that balances low setup stress with strong security habits. That usually means starting with a vendor-friendly remote access option or a private mesh solution before attempting advanced networking changes. The goal is simple access to your files — not turning your home network into a weekend IT project.
💬 Quick Answer — If security is your main fear: If your main concern is exposing your NAS to the internet, avoid starting with manual port forwarding. A safer beginner path is to use a private-access method that reduces public exposure, then layer in security basics — strong passwords, two-factor authentication, regular updates, and separate user accounts for each family member.
Is it safe to access my NAS remotely?
Yes — as long as you use the right method. The danger comes from exposing your NAS directly to the internet, for example by opening ports on your router without protection. The 3 methods in this guide — QuickConnect, Tailscale, and NordVPN Meshnet — all avoid that risk by creating an encrypted tunnel between your device and your NAS. Think of it like a private hallway between your phone and your home server: only you and the people you invite have a key. For an extra layer of protection, always enable two-factor authentication (2FA) on your NAS account. See our complete NAS ransomware protection guide for the full security checklist.
Do I need port forwarding to access my NAS from outside home?
No — and you should avoid it if you are not an expert. Port forwarding opens a door in your home router for incoming internet traffic, which sounds useful but is a common way NAS devices get hacked when misconfigured. QuickConnect, Tailscale, and NordVPN Meshnet all work without touching your router settings. They connect through secure relay servers or encrypted peer-to-peer tunnels — no door-opening required.
Can my family access the NAS remotely without seeing admin settings?
Absolutely — and this is exactly how you should set it up. Both Synology (DSM) and UGREEN NAS let you create limited user accounts with access only to specific shared folders. Your teenager can see the “Family Photos” folder from their phone but cannot touch your backup settings, install apps, or see other users’ private files. Think of it like a hotel key card: it opens your room, not the management office. Create a separate account for each family member and set folder permissions individually.
What is the easiest remote access method for Synology beginners?
Synology QuickConnect is the easiest option by far — it is built directly into the Synology DSM (DiskStation Manager) interface. You create a free Synology account, enable QuickConnect in the Control Panel, and you get a personal link like quickconnect.to/yourname. From then on, any family member can log in from any browser or the DS mobile app — no app installations beyond the official Synology apps, no configuration needed. For a Synology DS224+ first-timer, this takes about 5 minutes to set up.
How do I access my UGREEN NAS remotely?
UGREEN NAS devices run UGOS Pro, their own operating system, which includes a built-in remote access feature similar to Synology’s QuickConnect. You can access your UGREEN NAS from anywhere using the UGREEN NAS mobile app or a web browser after linking the device to your UGREEN account. For more advanced access, Tailscale works natively with UGREEN NAS and can be installed directly from the UGOS app store. NordVPN Meshnet is also compatible: install the NordVPN client on any device connected to the same home network as your UGREEN NAS and use it as a gateway for your other family devices.
Is NordVPN Meshnet better than Tailscale for families?
It depends on your situation — and both are solid. Tailscale uses WireGuard, an open-source protocol considered the gold standard for VPN security — it is slightly more technically transparent. NordVPN Meshnet is easier to justify if you already pay for NordVPN: Meshnet is included at no extra cost, the app is something your family already has on their phones, and the brand is recognized and trusted. If privacy is your absolute top priority and you are comfortable with a new tool, go Tailscale. If you want the path of least resistance for a multi-device family, NordVPN Meshnet wins on convenience. Try NordVPN Meshnet → | See our Synology + NordVPN setup guide →
Is remote NAS access safe for family photos?
Yes — when you use a safe access method. Vendor relay tools like QuickConnect and private mesh networks like Tailscale keep your photos accessible to your family without exposing them to the public internet. The risk comes from unsafe configurations like open ports or weak passwords, not from remote access itself. Enable 2FA, use strong credentials, and keep your NAS firmware up to date for a secure setup.
Do I need port forwarding to use my NAS away from home?
No. Most families can skip port forwarding entirely. Vendor relay services and mesh VPN tools like Tailscale both provide remote access without requiring any router changes. Port forwarding is an option for advanced users who want specific configurations, but it is not a requirement — and for beginners, it is better to avoid it until you understand the security implications.
What is easier for beginners: QuickConnect, Tailscale, or a VPN?
QuickConnect is the easiest starting point — it takes minutes to enable and works instantly with the official Synology apps. Tailscale is slightly more involved but still beginner-manageable, and it offers stronger privacy since your NAS stays off the public internet. NordVPN Meshnet is a strong middle ground if your family already uses NordVPN. Start with QuickConnect and add Tailscale or Meshnet if you want an extra layer of privacy.
Can I access my Synology NAS from my phone?
Yes. Synology offers the DS File app for general file access and DS Photo for photo management, both available for iOS and Android. Once QuickConnect is set up, you log in with your QuickConnect ID and NAS credentials and browse your files directly from your phone — no browser, no VPN, no technical setup needed on the mobile side.
Can my spouse or kids access shared folders without admin access?
Yes, and this is exactly how you should set it up. Create a separate user account for each family member with permissions limited to the folders they actually need. Your spouse’s account can have full access to the shared family drive. Your child’s account can be limited to a single photos folder. Nobody except you needs to log in with admin-level credentials. This limits the damage if any single account is ever compromised.
What is the safest remote access method for beginners?
Tailscale is the safest beginner-accessible option because it keeps your NAS completely invisible to the public internet — there are no open ports and no public-facing services to exploit. Your NAS only responds to devices that are explicitly approved on your private Tailscale network. For families who want maximum peace of mind with a manageable setup process, Tailscale is the clear recommendation.
Will remote access slow down my NAS?
Remote access itself does not slow your NAS down significantly for typical family use. The real bottleneck is your home internet’s upload speed — when you access files remotely, data travels out through your home connection. If you are on a plan with limited upload bandwidth, large file transfers may feel slow. Viewing photos and browsing folders is generally fast even on modest connections; transferring large video files takes longer.
Should I use the admin account for remote login?
No. Never use the admin account for routine remote access. Create a standard user account with the specific permissions you need — typically read/write access to your own folders — and use that account for remote login. Reserve the admin account for in-home management tasks only. If possible, disable the default “admin” username entirely and replace it with a non-obvious account name to reduce automated attack exposure.
What happens if my internet goes down at home?
If your home internet goes down, all remote access methods stop working — because your NAS has no way to receive incoming connections or relay traffic without an active internet connection. This is true for QuickConnect, Tailscale, and VPN-based setups alike. Nothing you configure on the NAS side can bypass a home internet outage. If you need high-availability file access regardless of home connectivity, that requires a hybrid approach with cloud backup or a secondary offsite storage solution.
Do I still need backups if remote access is enabled?
Absolutely yes. Remote access and backups are completely separate concepts. Remote access lets you reach your files. Backups protect your files from being lost. A ransomware attack, drive failure, or accidental deletion would destroy your files whether or not remote access is enabled. Apply the 3-2-1 backup strategy — at least one local backup copy and one off-site copy — and confirm backups are working before you enable remote access.
Can I remotely access a NAS while traveling internationally?
Yes. QuickConnect, Tailscale, and VPN-based remote access all work across international borders as long as both your NAS (at home) and your device (abroad) have active internet connections. Speeds may vary depending on the physical distance between you and your home connection. One thing to be aware of: some countries restrict certain VPN protocols, so if you travel frequently, testing your chosen method before departure is a smart habit.
What should I do first if remote login stops working?
Start with the simplest possible checks: Is your home internet connection active? Is the NAS powered on and connected to your router? Has DSM recently updated and possibly restarted? Then confirm the remote access feature is still enabled in your NAS control panel — firmware updates occasionally reset certain settings. If you use QuickConnect, log into your Synology account from a browser to verify the connection status. If you use Tailscale, check the Tailscale admin console to confirm your NAS device shows as connected. For persistent Synology issues, the Synology support center has model-specific troubleshooting documentation.
Get the HomeCloudHQ NAS Setup Checklist — Free
We send one email per week: practical NAS tips, security reminders, and honest beginner guides. No fluff, no spam — unsubscribe any time.