- • Guardian v1.3.4 gives real-time control over Plex streams
- • Get your Plex token in 30 seconds via browser Developer Tools
- • Deploy with Docker Compose via Portainer in under 5 minutes
- • Monitor active streams and terminate unwanted sessions
- • Set per-user access policies and temporary permissions
- • Works on Synology, UGREEN, and any Docker‑capable NAS
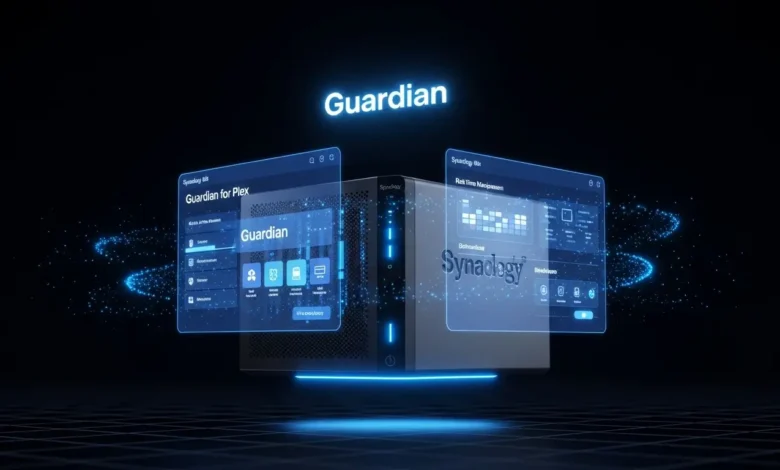
Looking for a complete Guardian Synology install 2026 guide? You’ve come to the right place. Guardian is a lightweight companion app for Plex Media Server that lets you monitor, approve, or block streaming devices in real time. In this step‑by‑step tutorial, I’ll show you exactly how to get it running on your Synology NAS using Docker and Portainer.
📋 Prerequisites for Guardian Synology Install 2026
- A Synology NAS running DSM 7.x or later
- Plex Media Server installed – follow our Plex installation guide if needed
- Portainer installed – use our 30‑second Portainer install guide
- SSH access (optional, for advanced troubleshooting)
🏆 Recommended NAS for Plex + Guardian
🔑 Step 1: Get Your Plex Token for Guardian Synology Install 2026
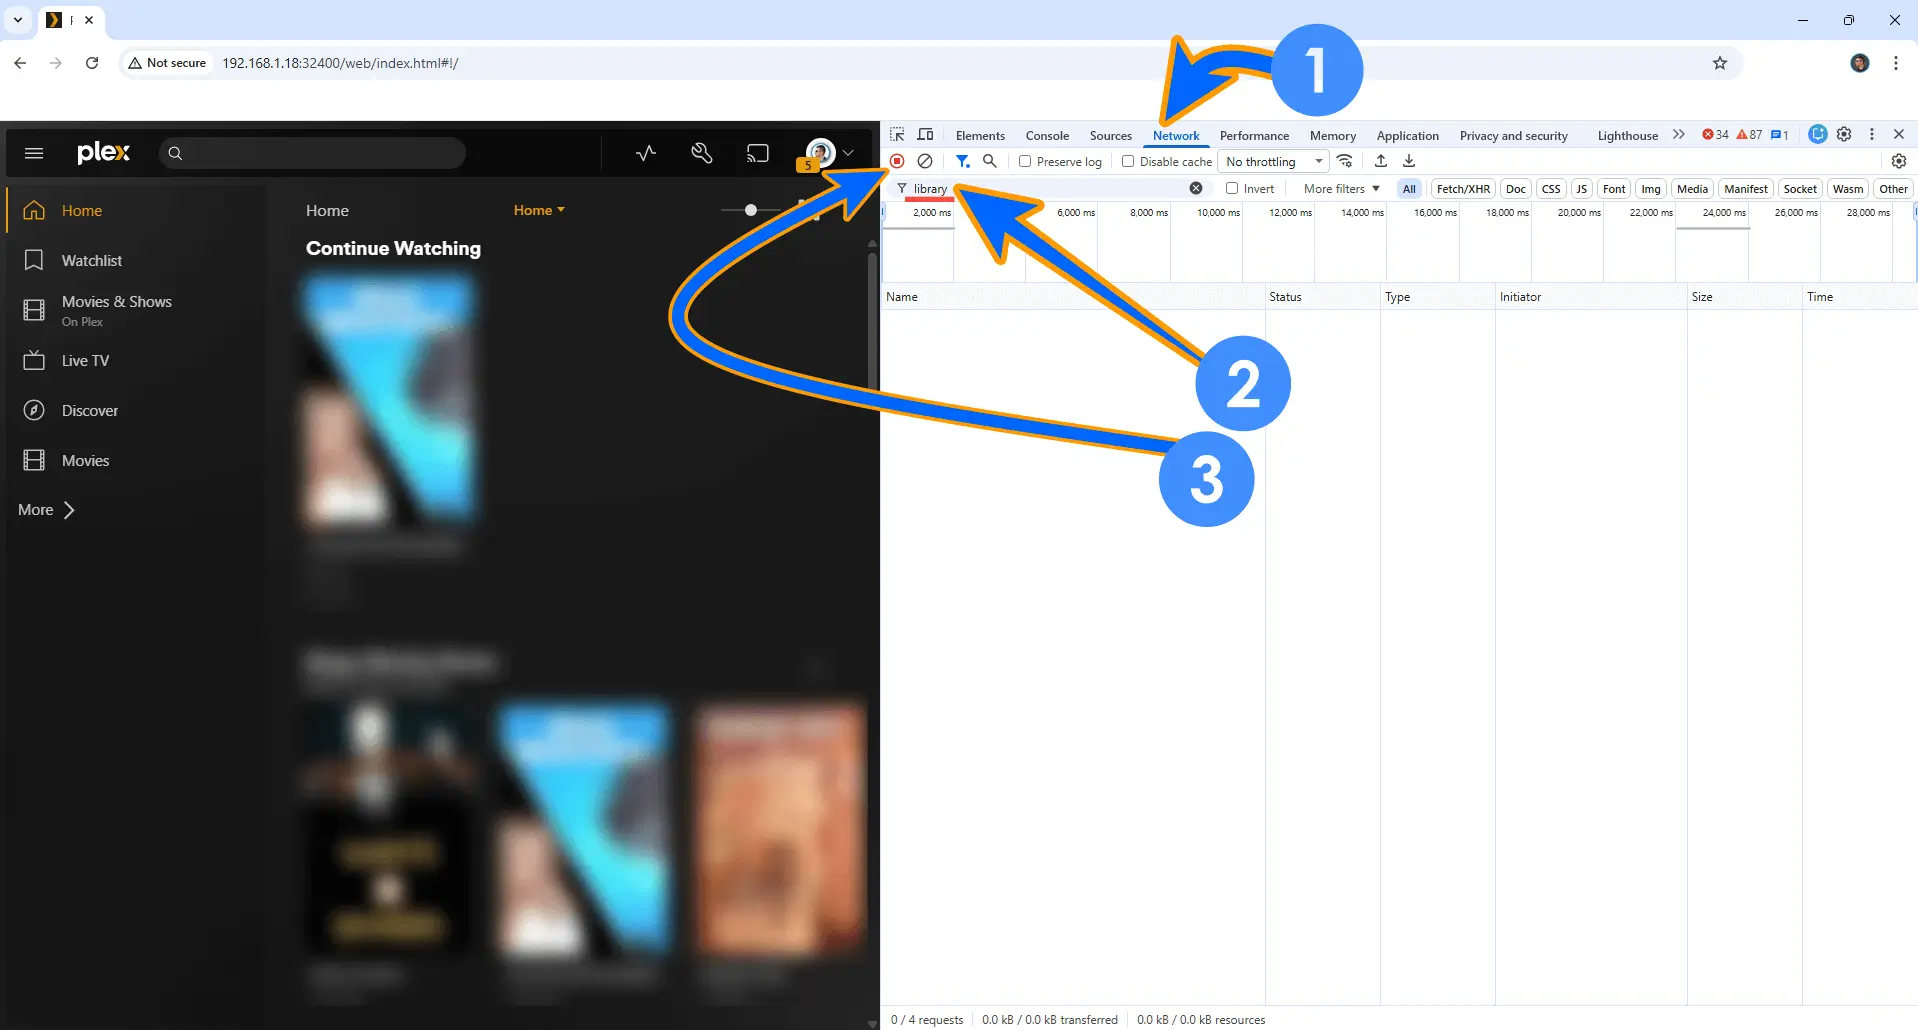
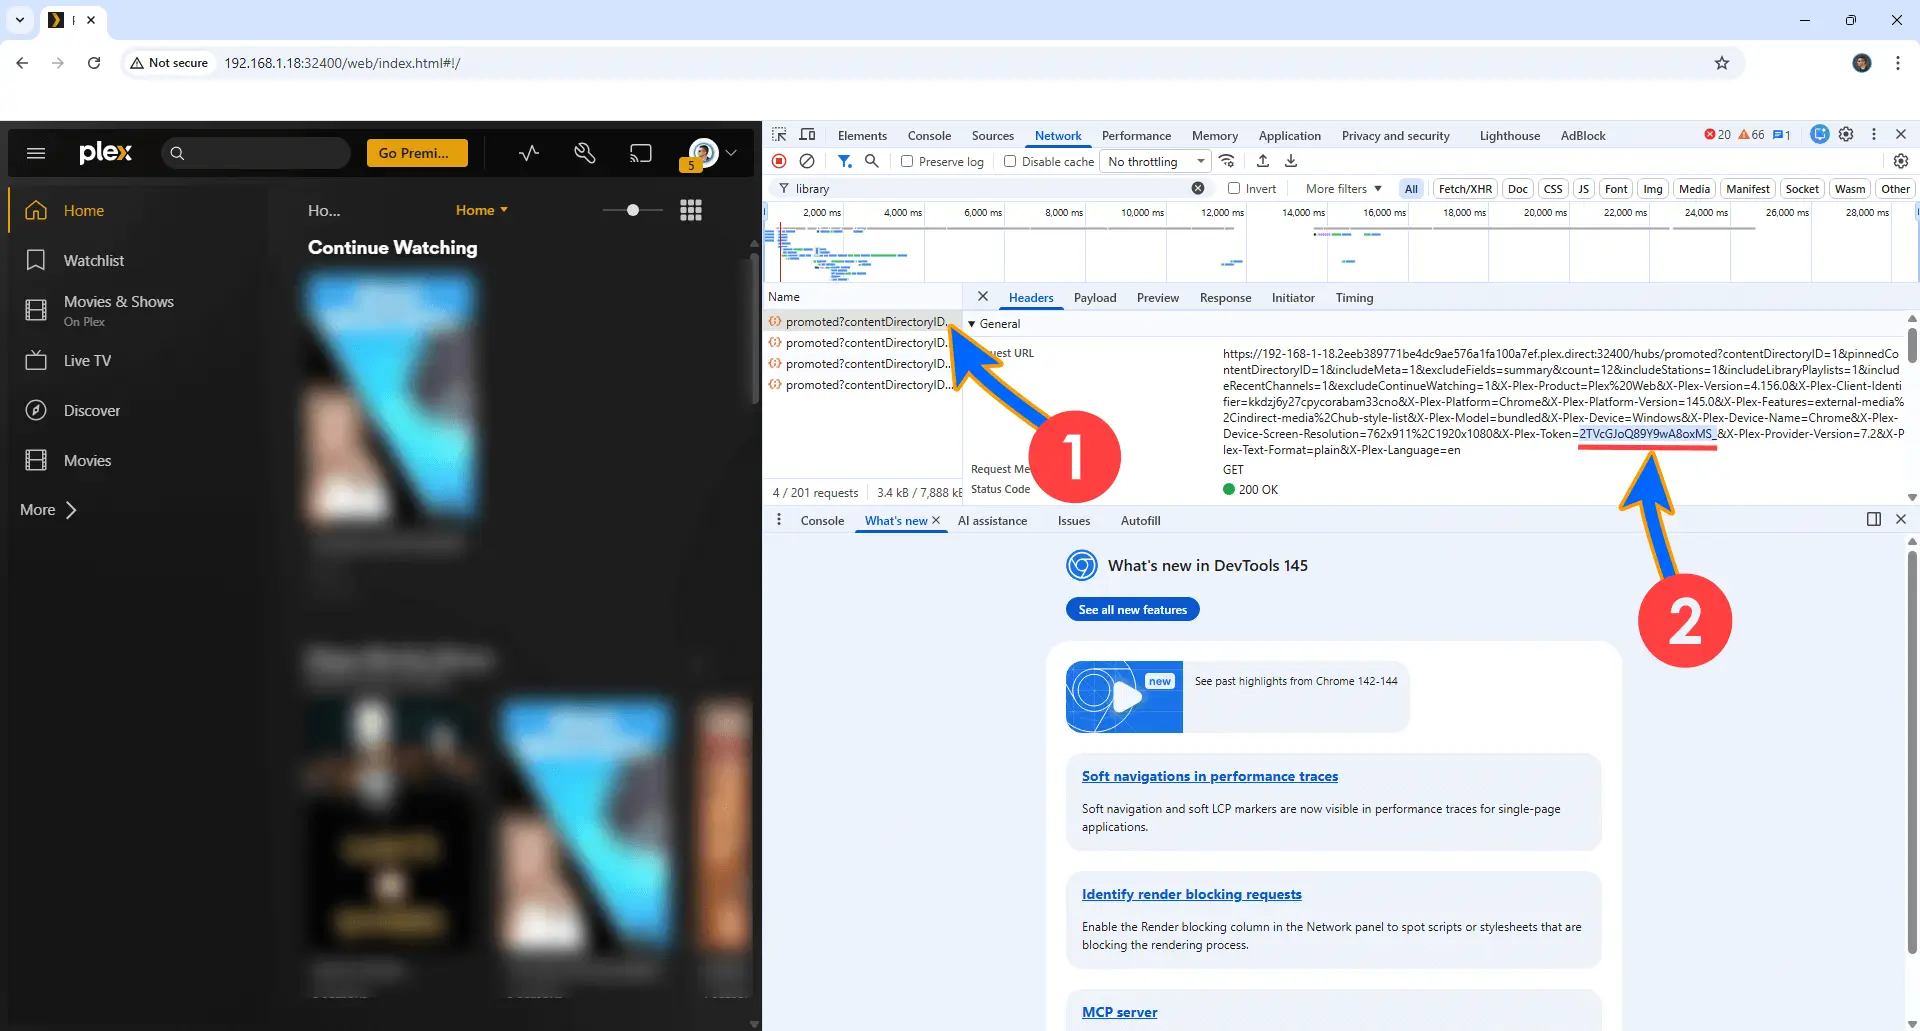
Guardian needs a Plex token to communicate with your server. Here’s how to find it:
- Connect to your Plex instance and go to Home
- Press F12 on your keyboard to open Developer Tools
- Expand the window and click the Network tab
- In the filter field, type library
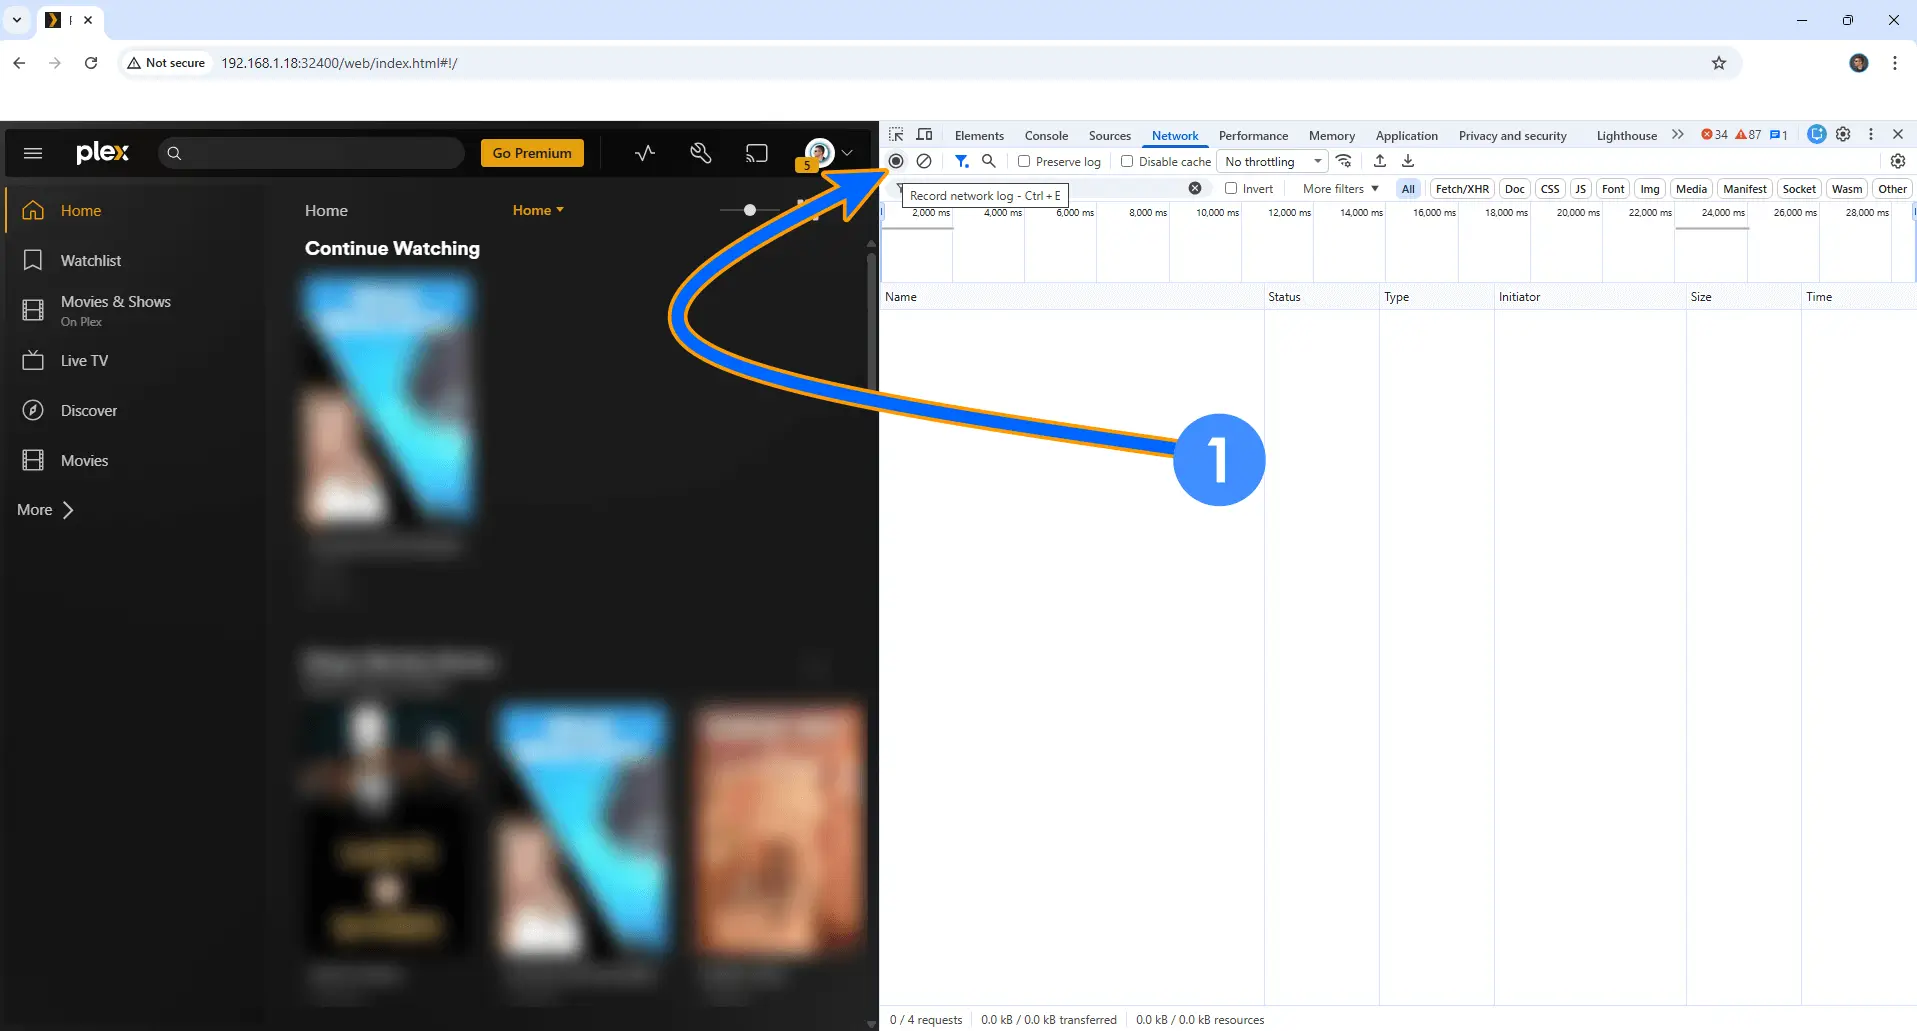
- Click the red record button to stop recording, then click Start to begin fresh recording
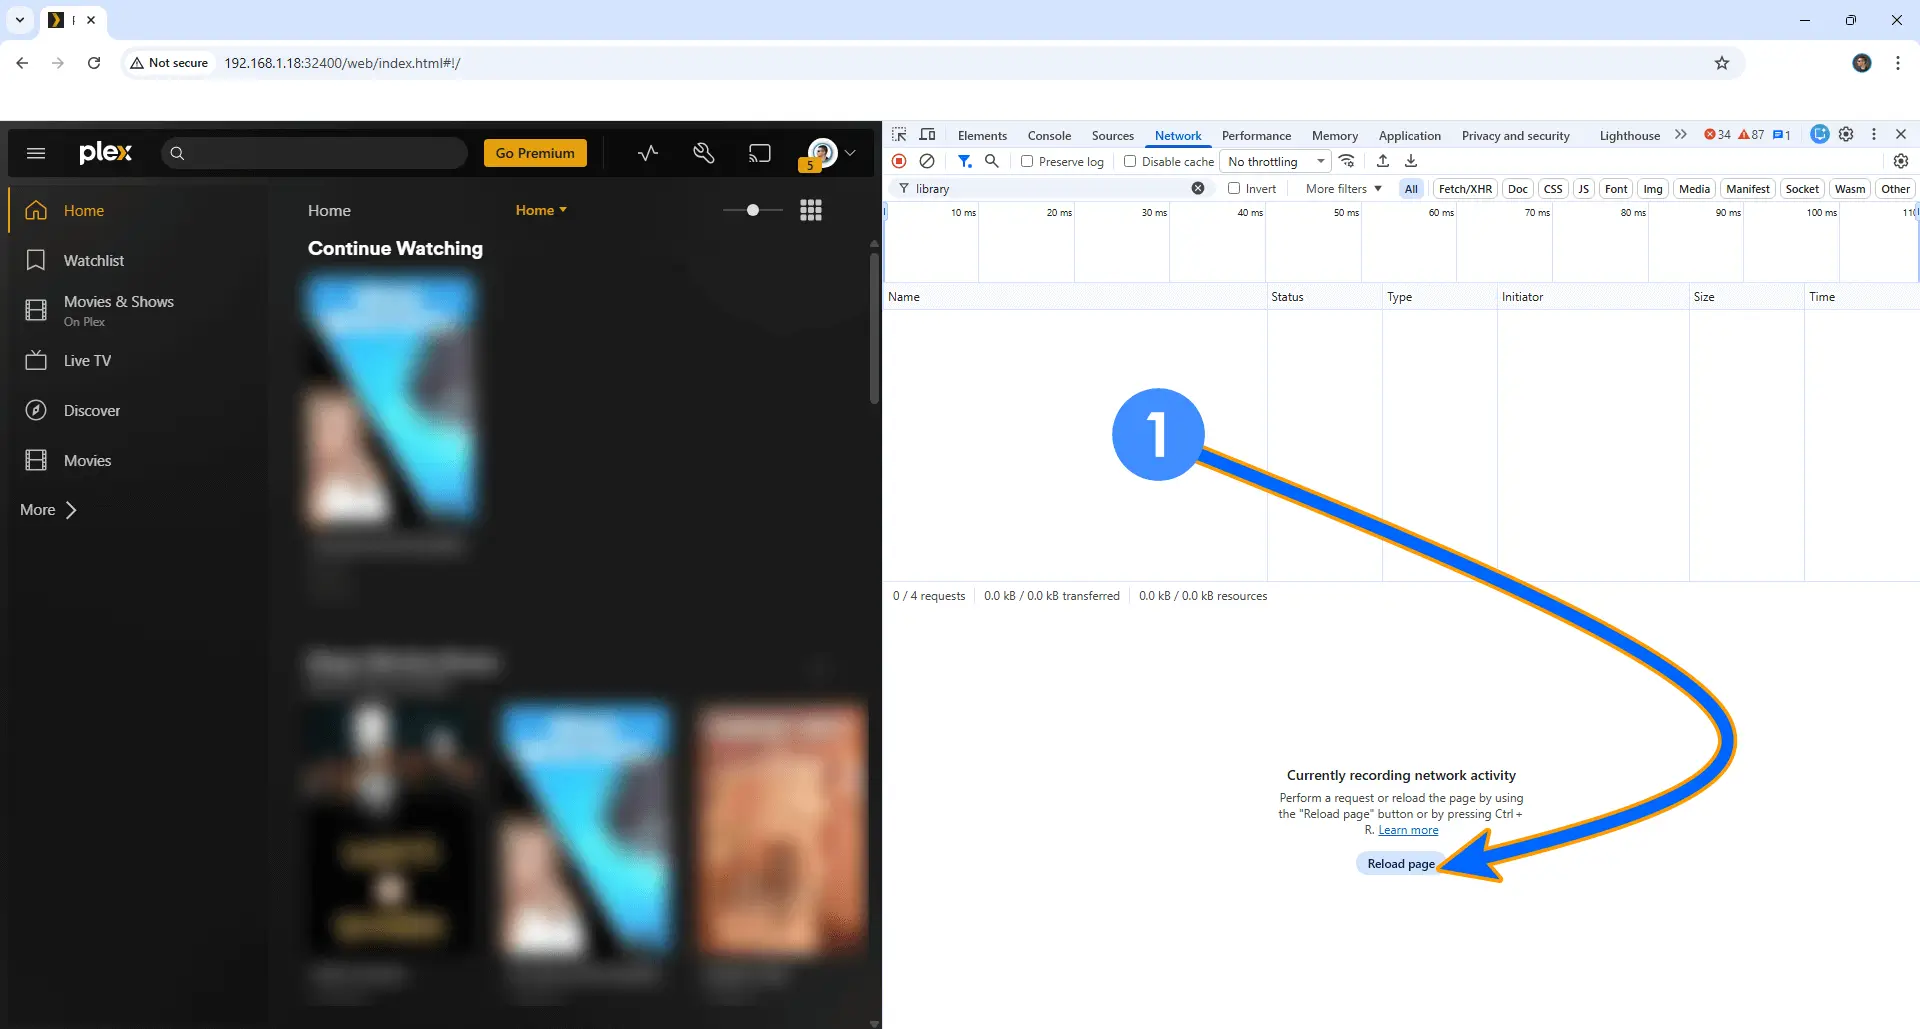
- Click Reload page
- In the Network tab, click on the first entry that appears
- Look for your Plex token between = and & in the URL parameters
- Copy and save this token – you’ll need it later
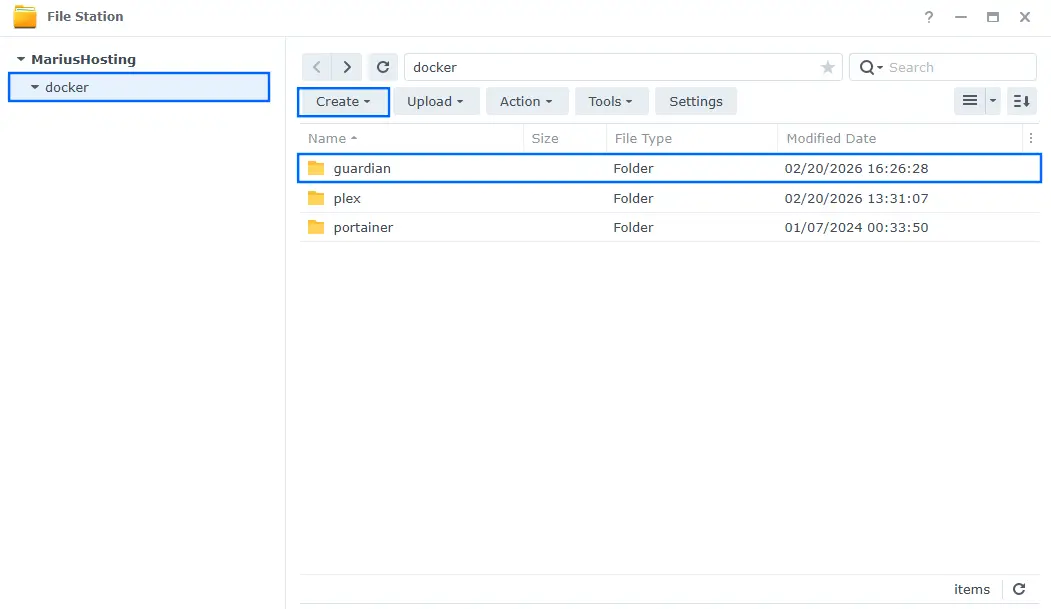
📁 Step 2: Create the Guardian Folder
- Open File Station in DSM
- Navigate to the docker shared folder
- Create a new folder named guardian (all lowercase)
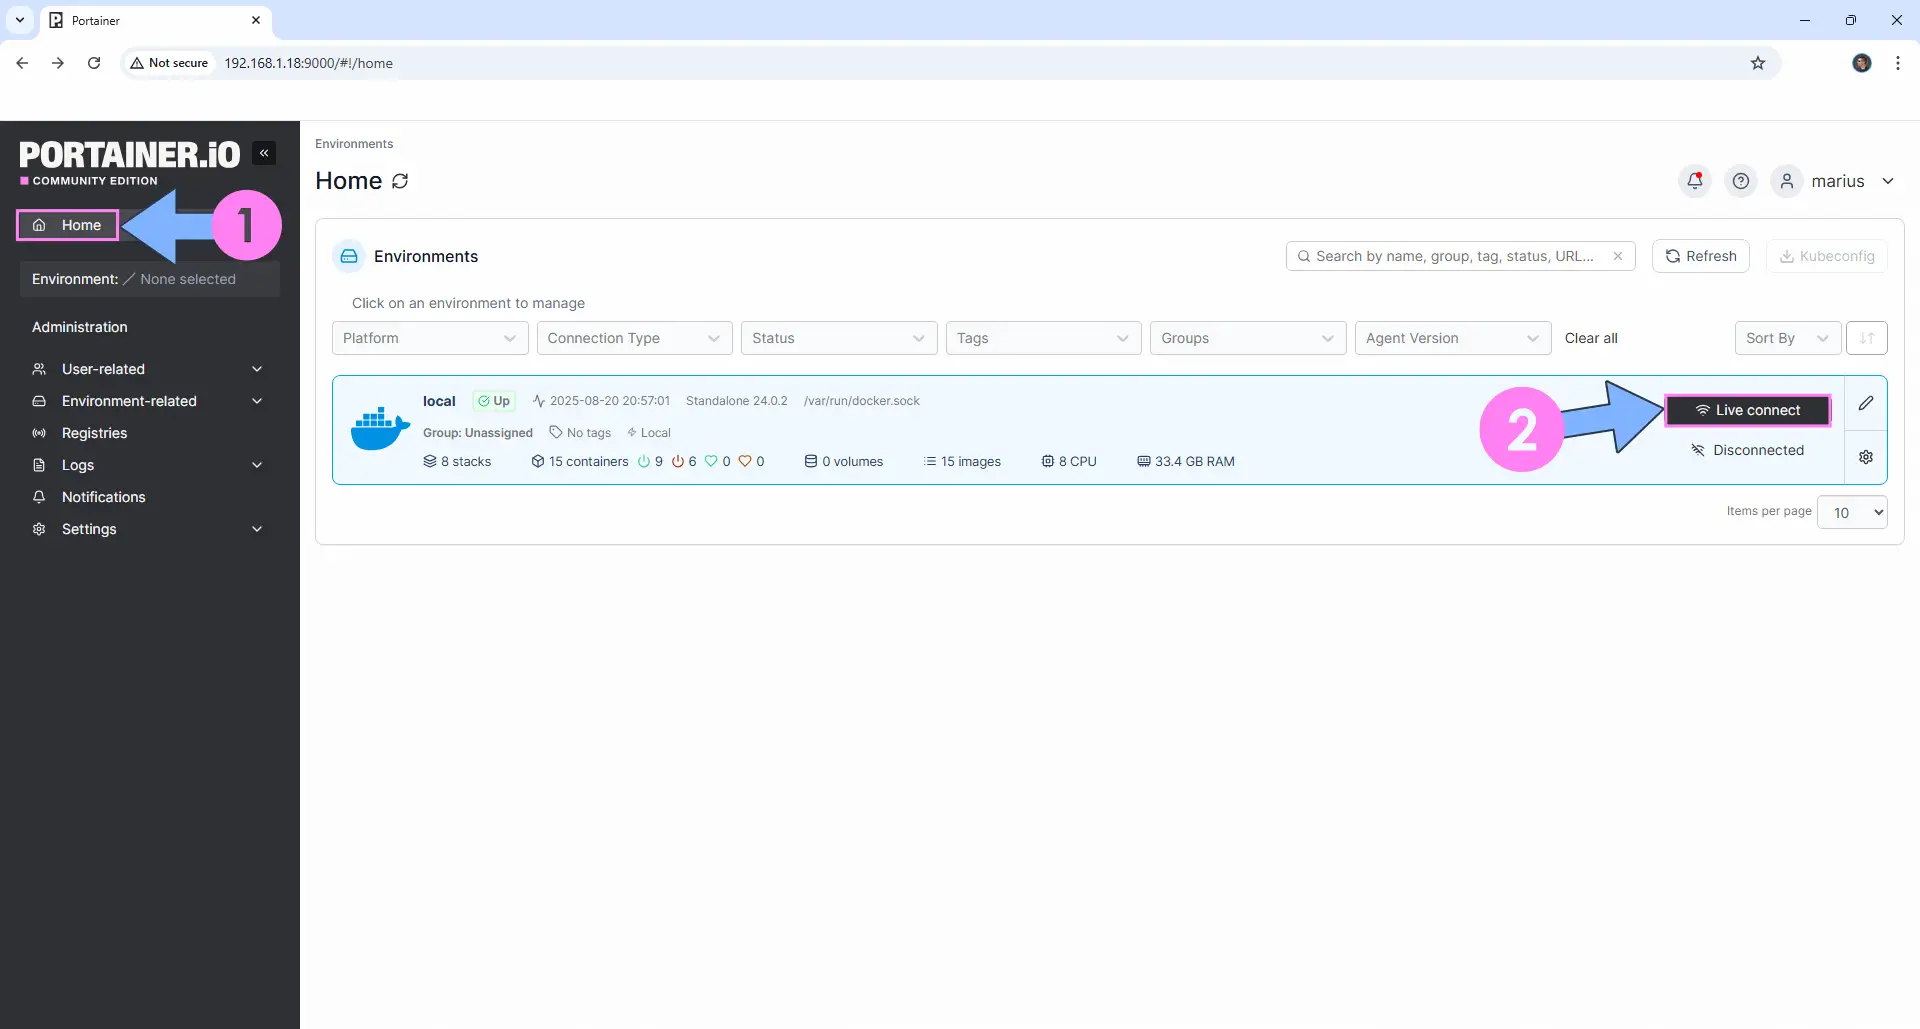
🐳 Step 3: Deploy Guardian Using Portainer
- Log into Portainer using your credentials
- On the left sidebar, click Home then Live connect
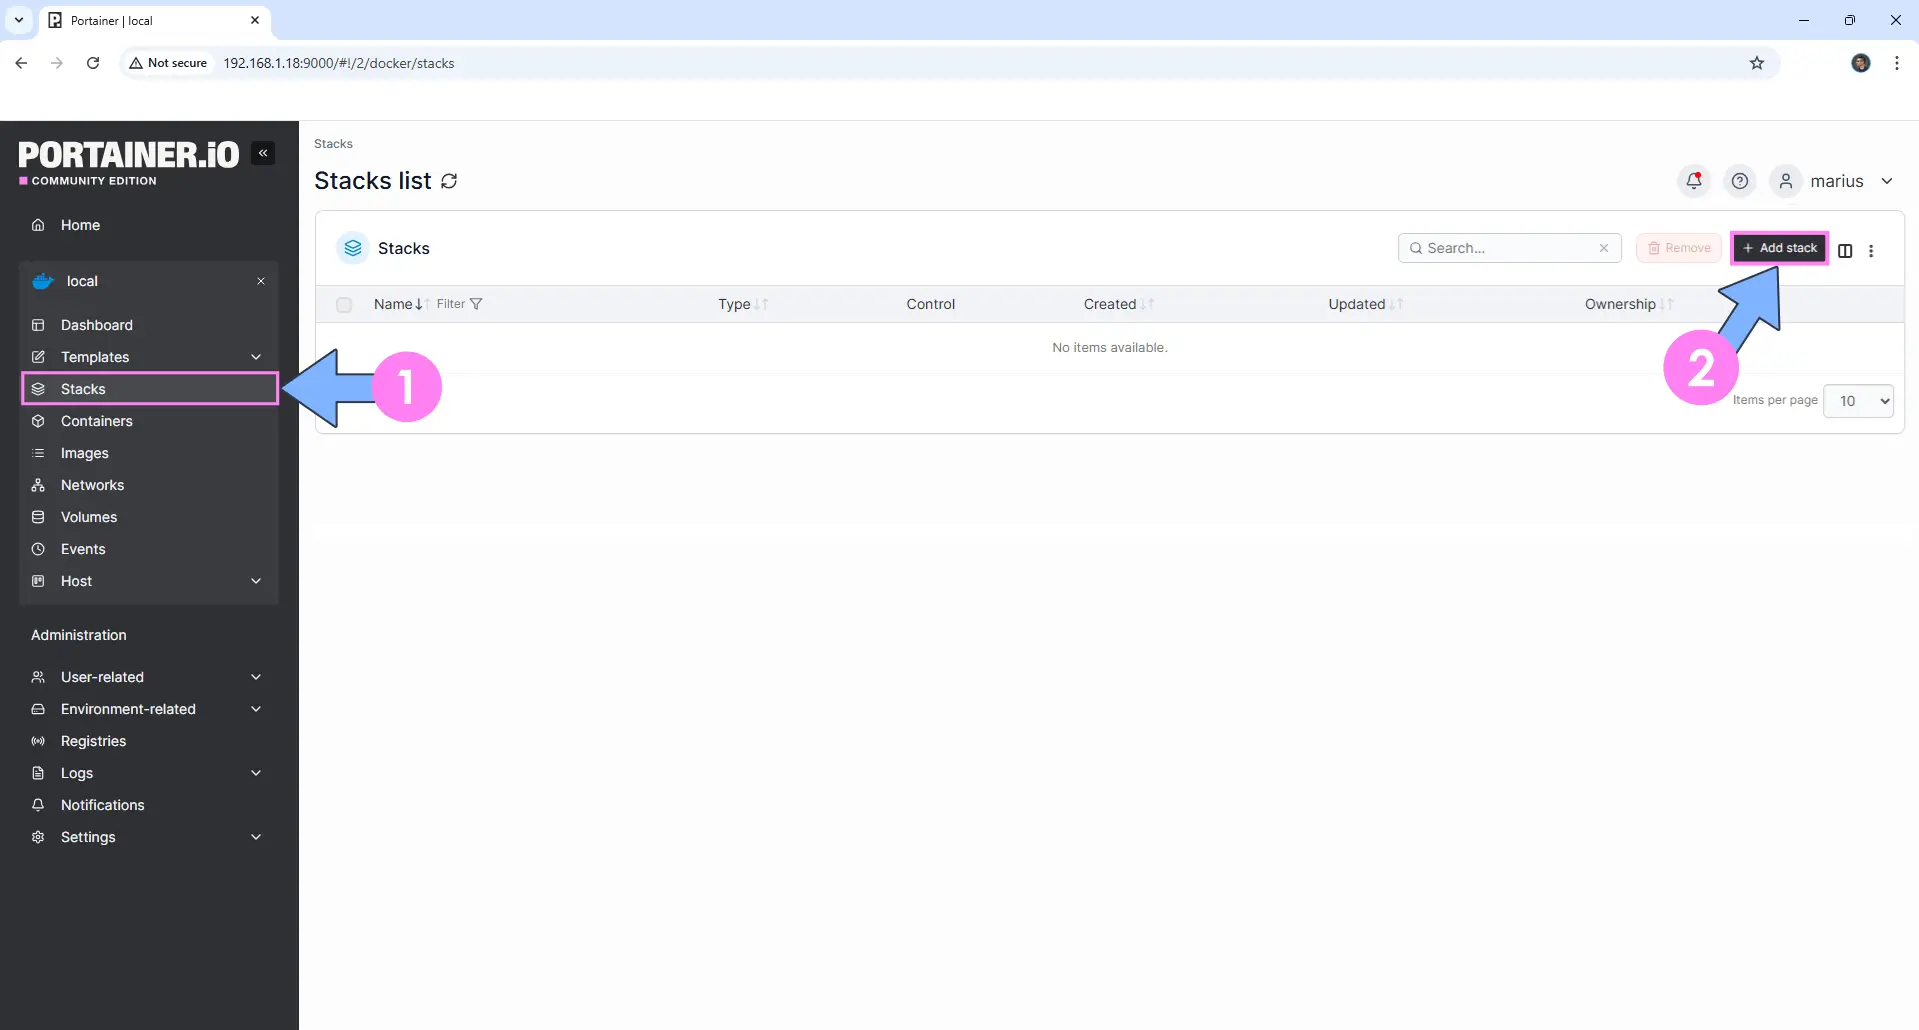
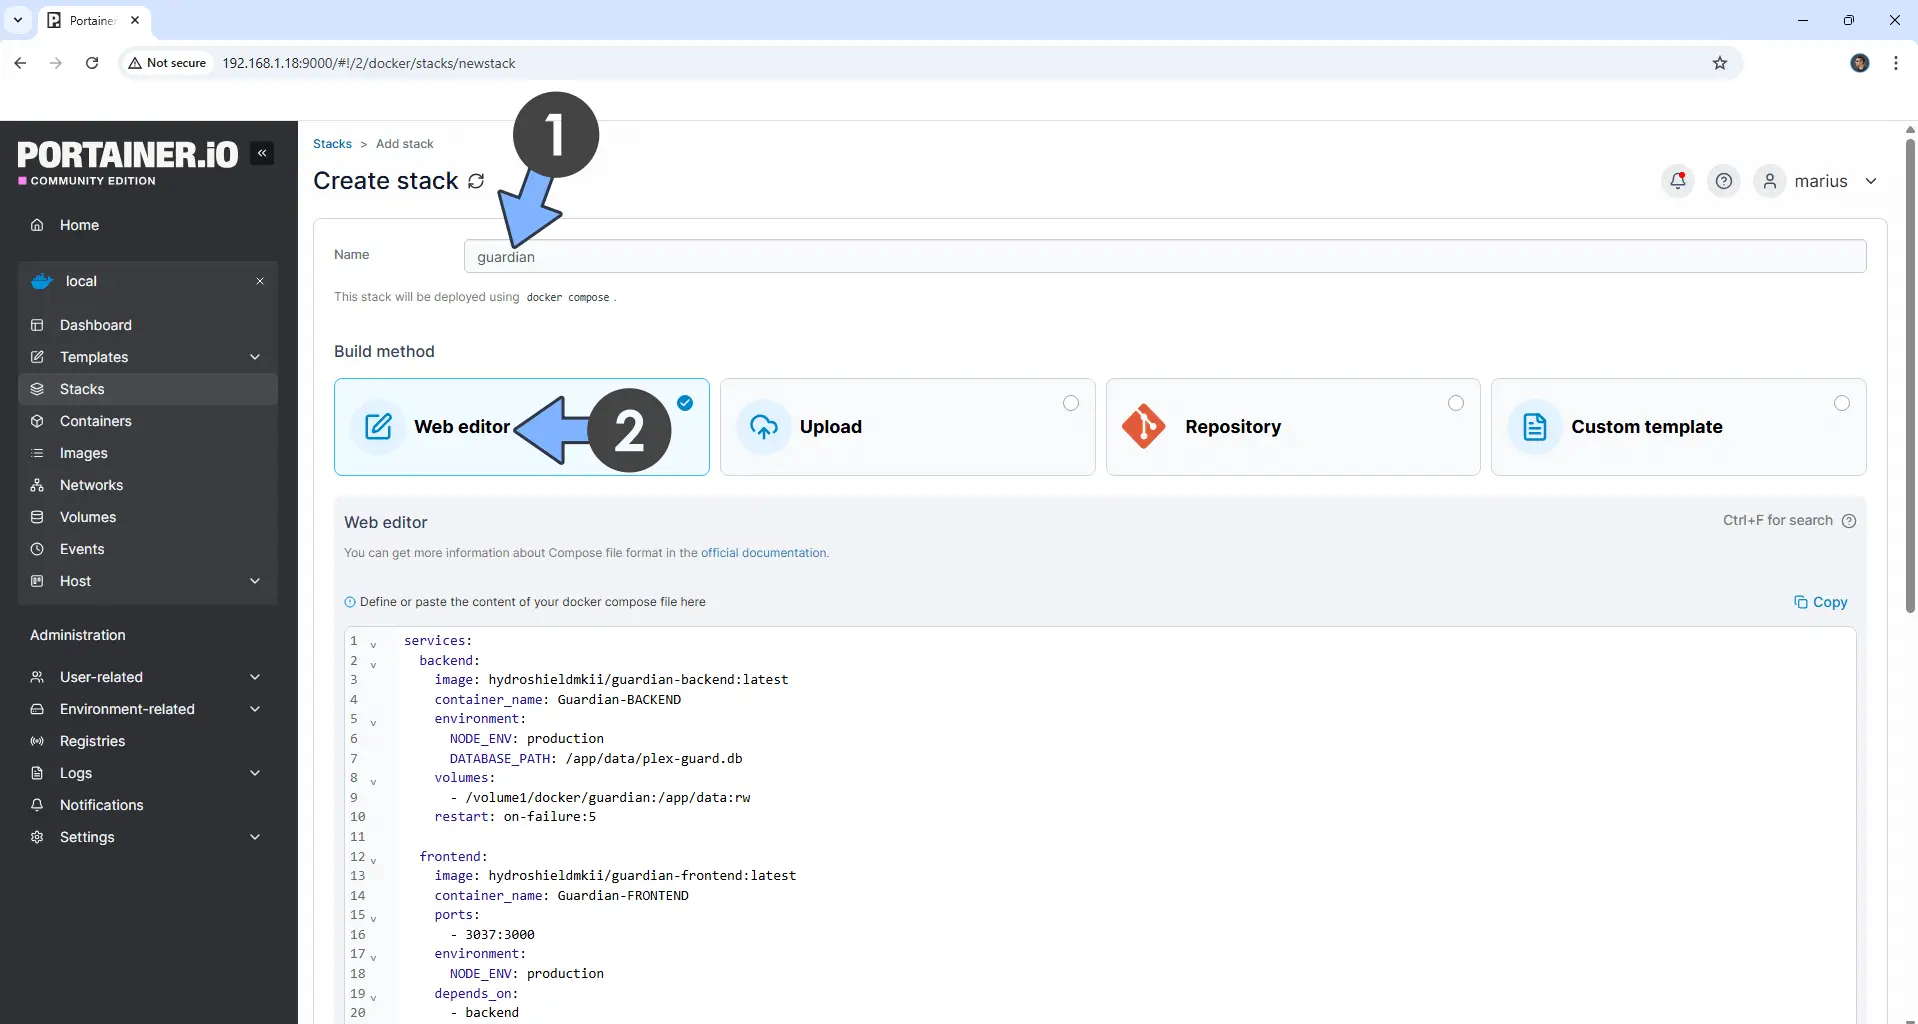
- Click Stacks → + Add stack
- Name your stack: guardian
services:
  backend:
    image: hydroshieldmkii/guardian-backend:latest
    container_name: Guardian-BACKEND
    environment:
      NODE_ENV: production
      DATABASE_PATH: /app/data/plex-guard.db
    volumes:
      - /volume1/docker/guardian:/app/data:rw
    restart: on-failure:5

  frontend:
    image: hydroshieldmkii/guardian-frontend:latest
    container_name: Guardian-FRONTEND
    ports:
      - 3037:3000
    environment:
      NODE_ENV: production
    depends_on:
      - backend
    restart: on-failure:5
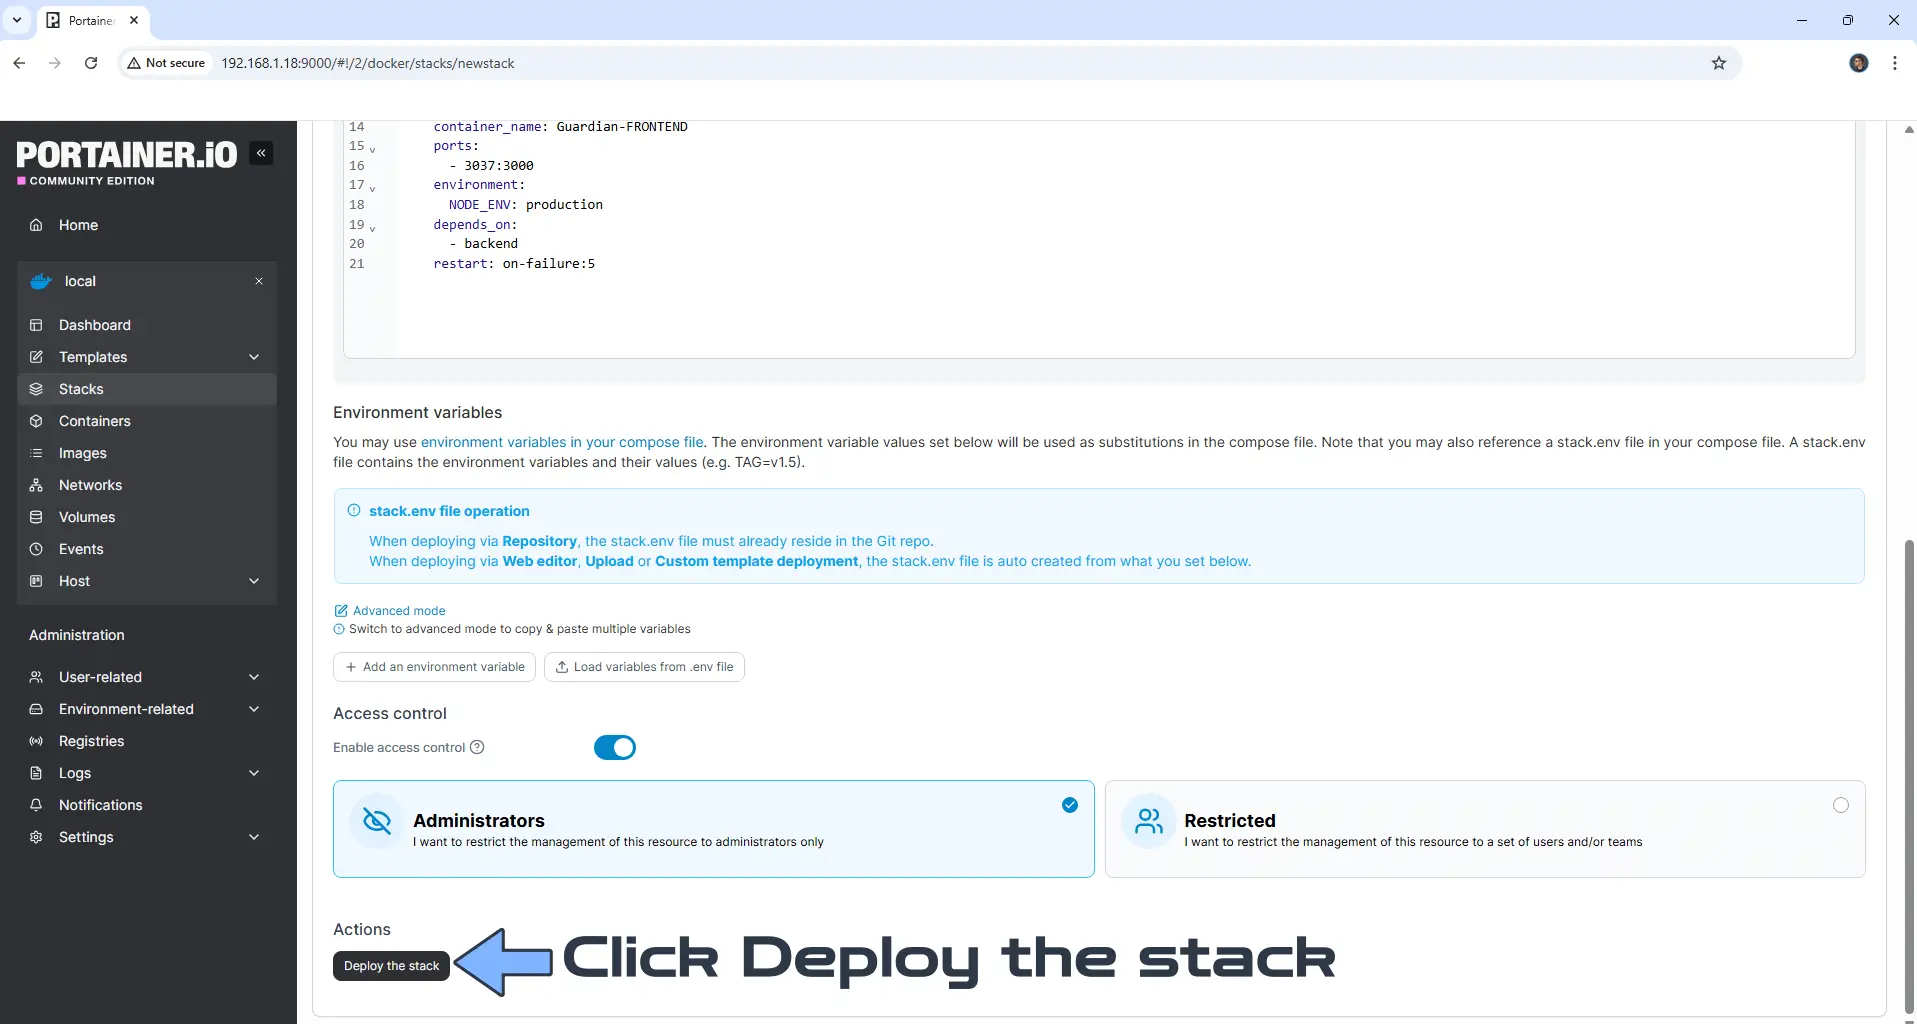
- Scroll down and click Deploy the stack
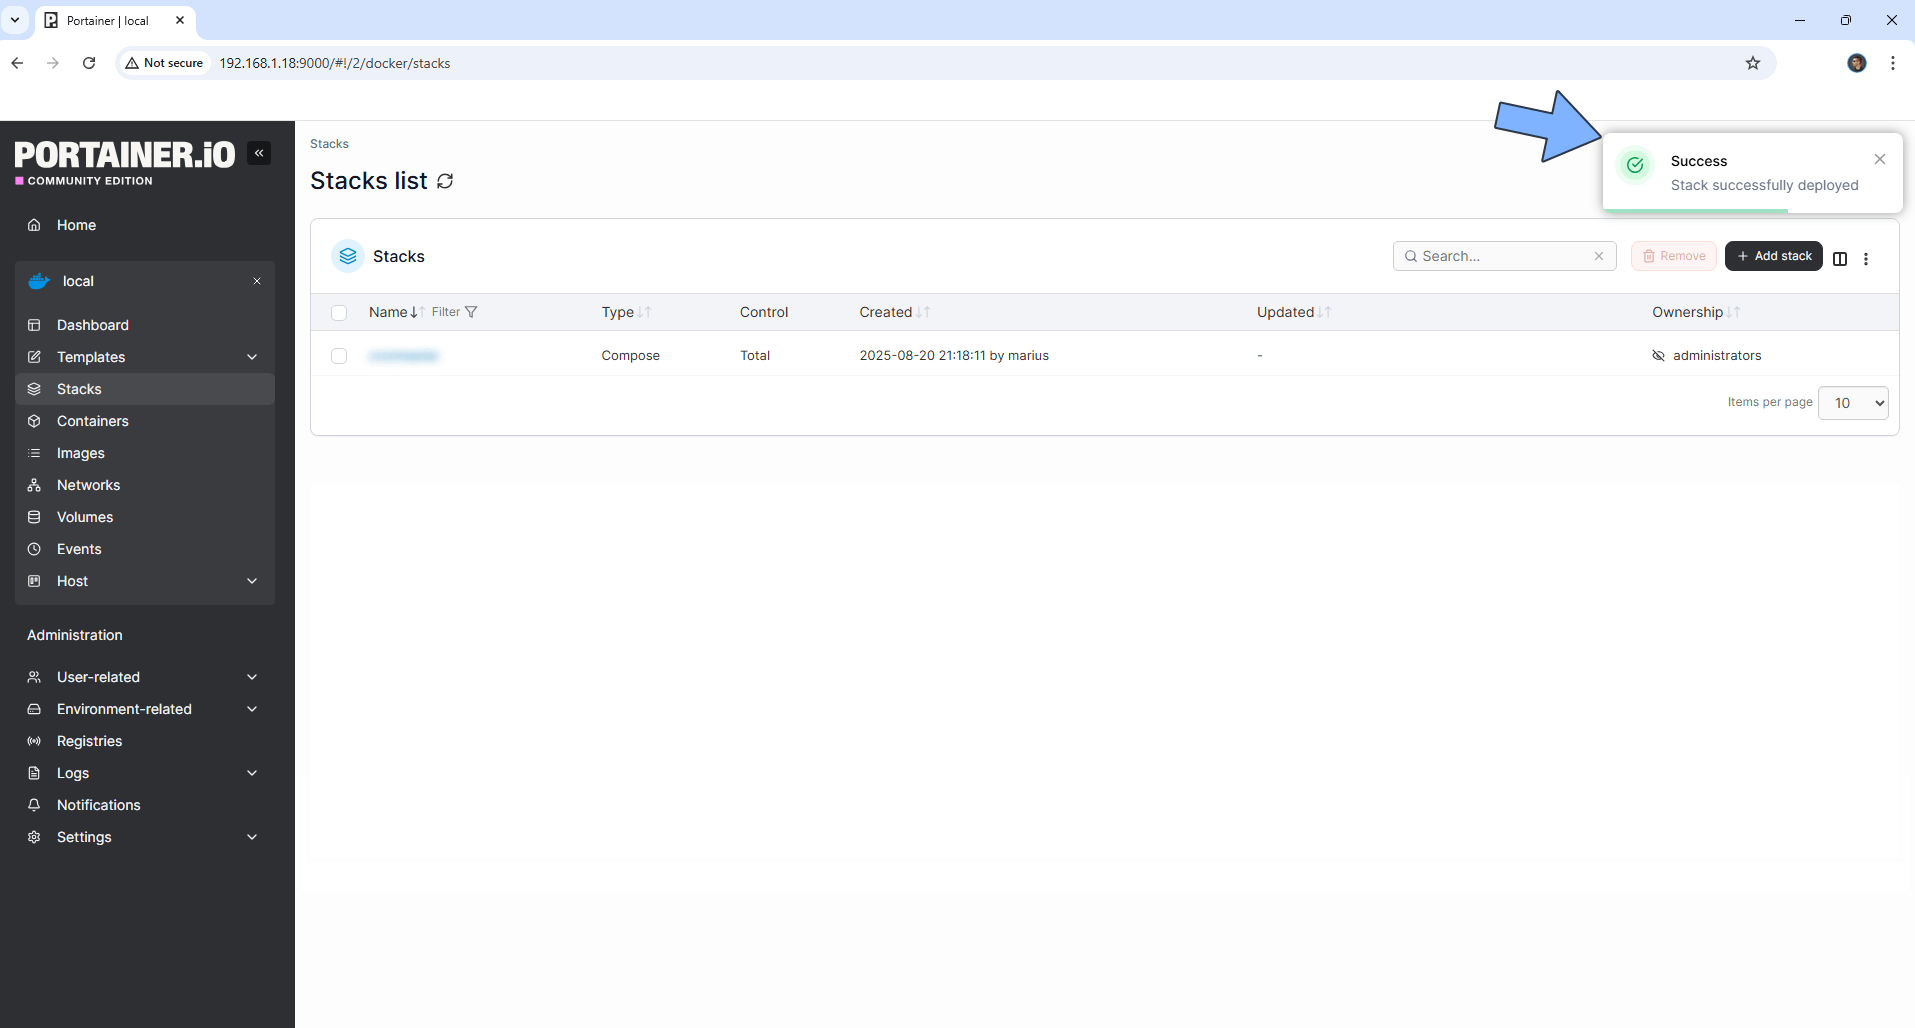
- Wait for the deployment to complete (1‑2 minutes depending on your internet speed)
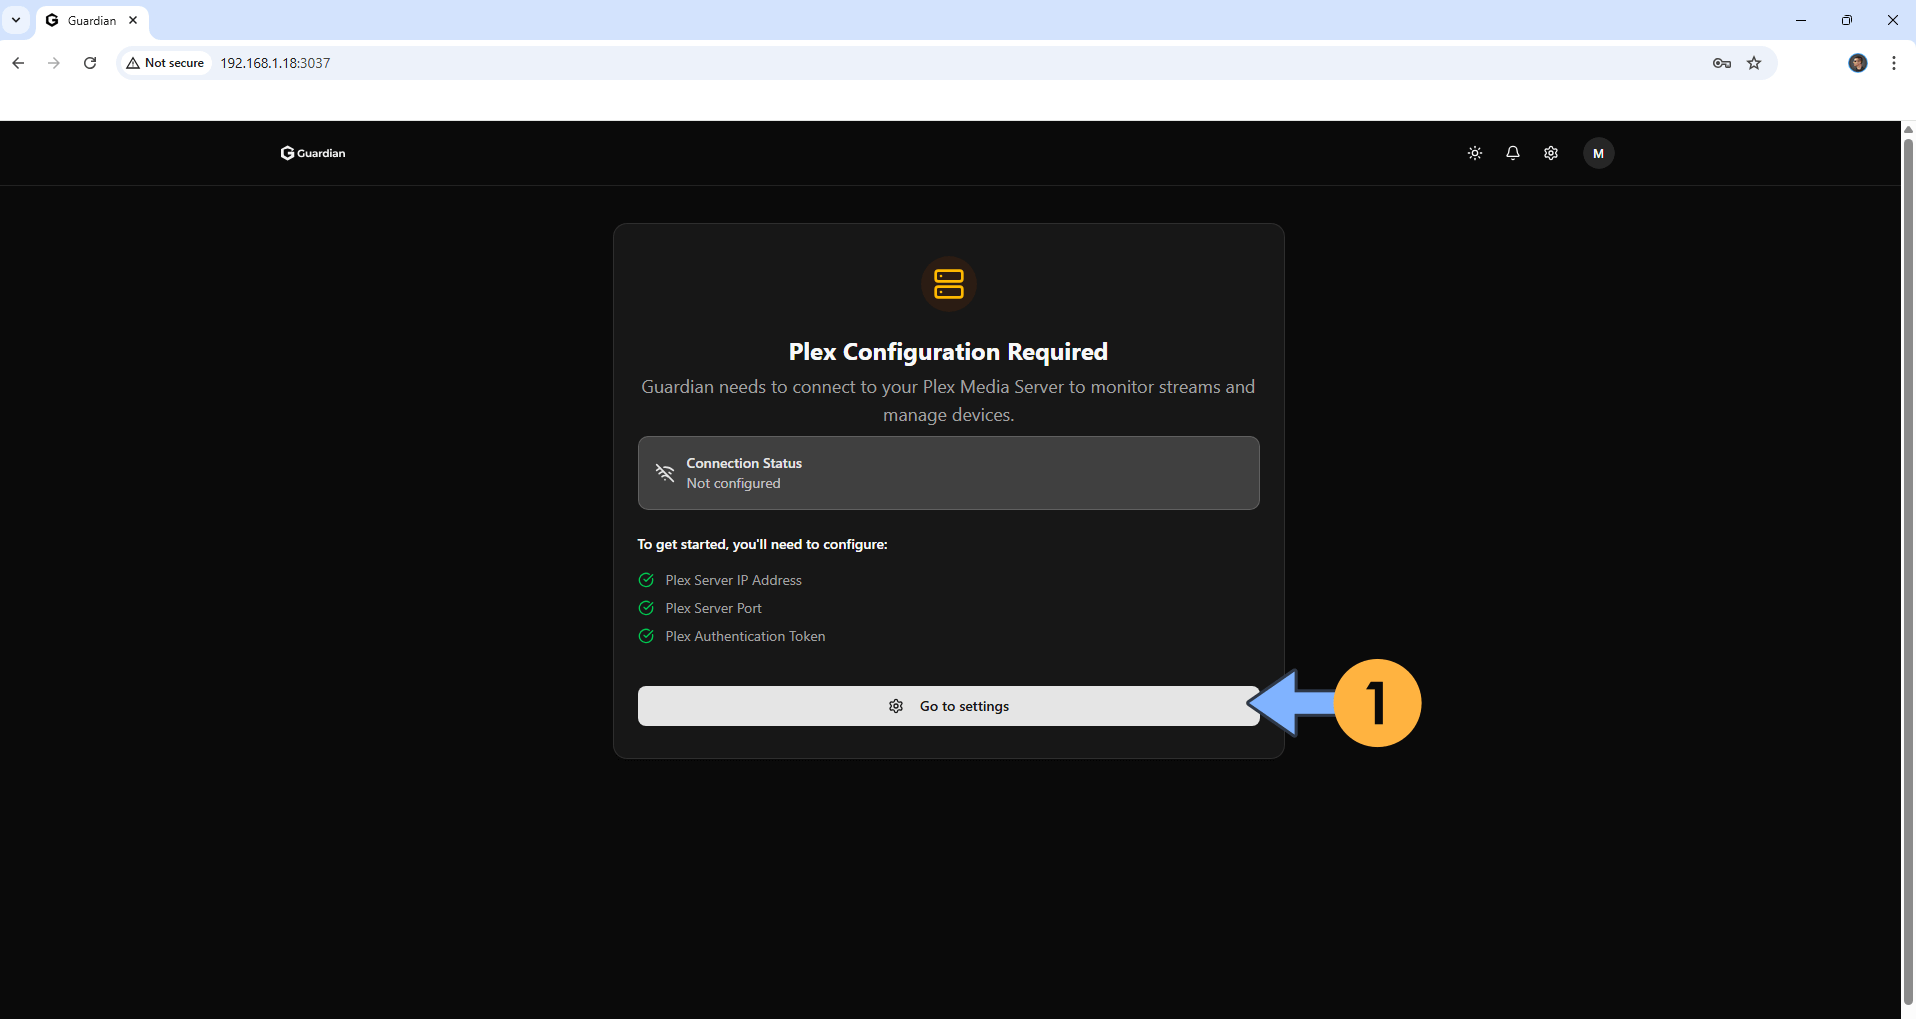
⚙️ Step 4: Initial Configuration
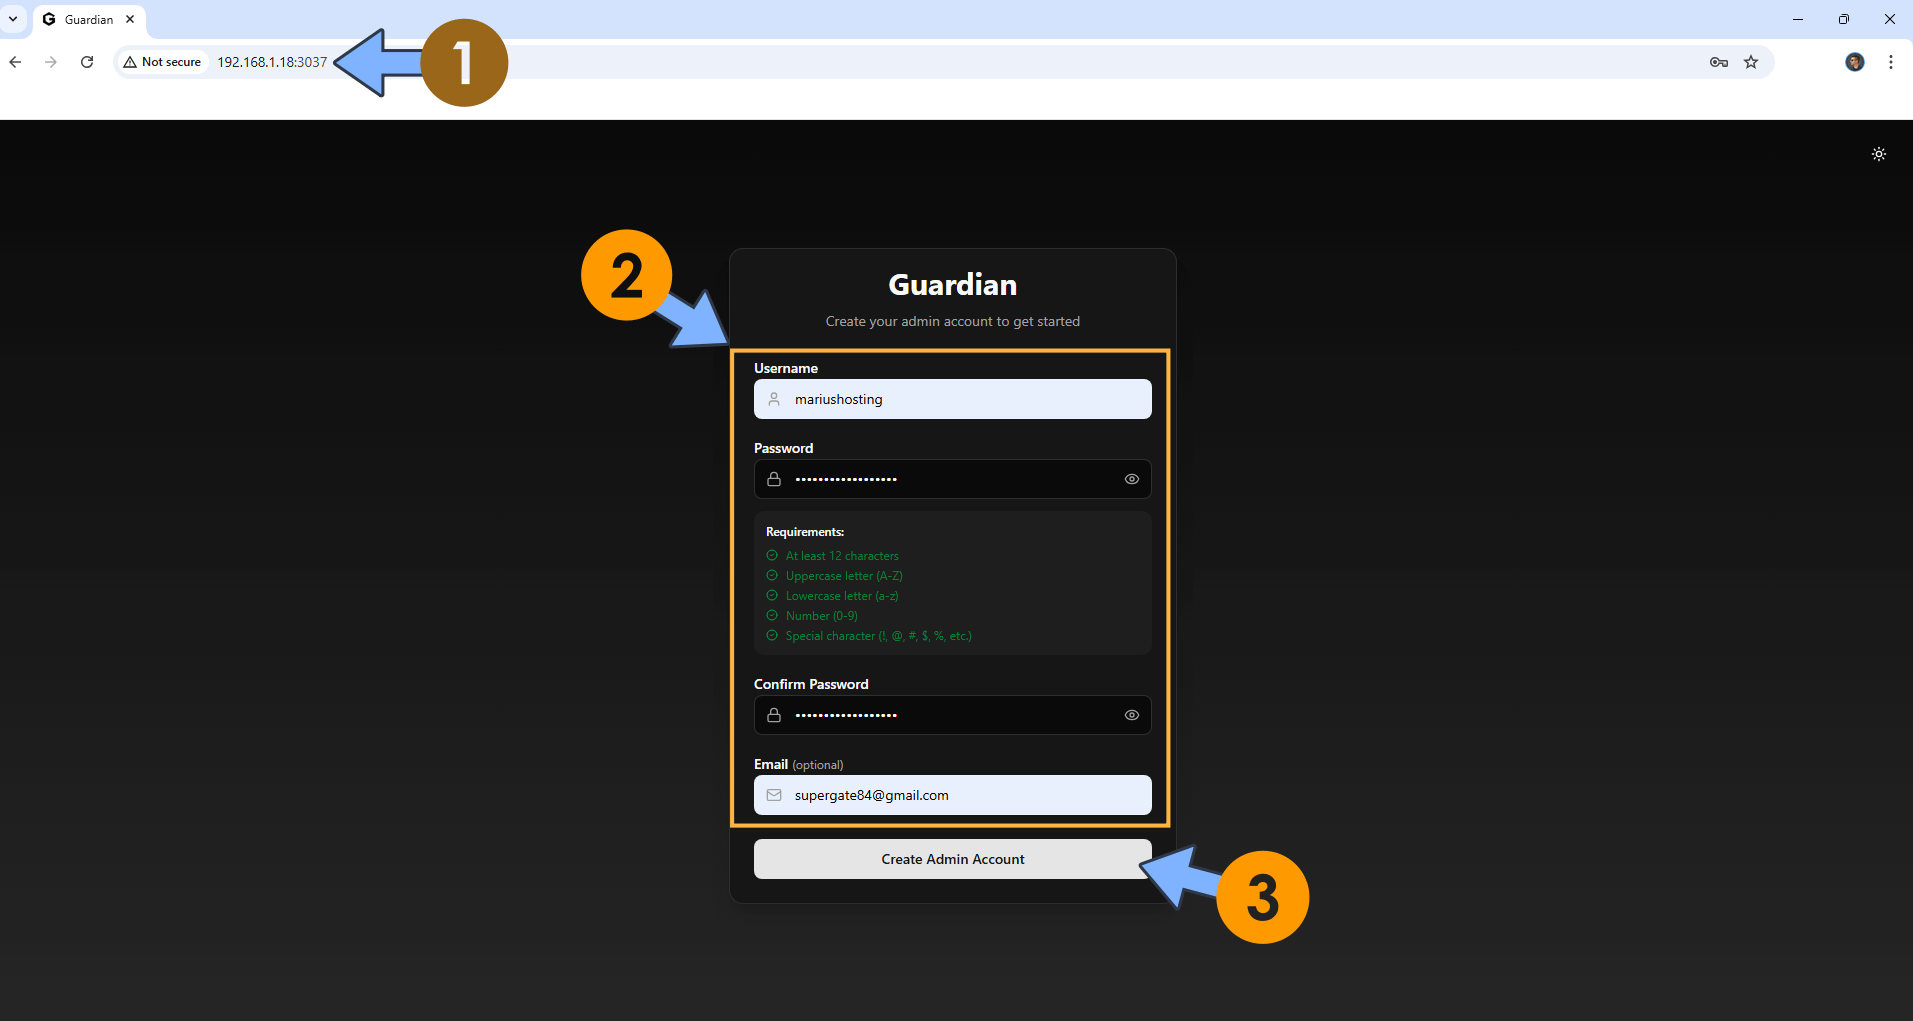
- Open your browser and navigate to: http://[YOUR_SYNOLOGY_IP]:3037
- Create your administrator account and click Create Admin Account
- Click Go to settings
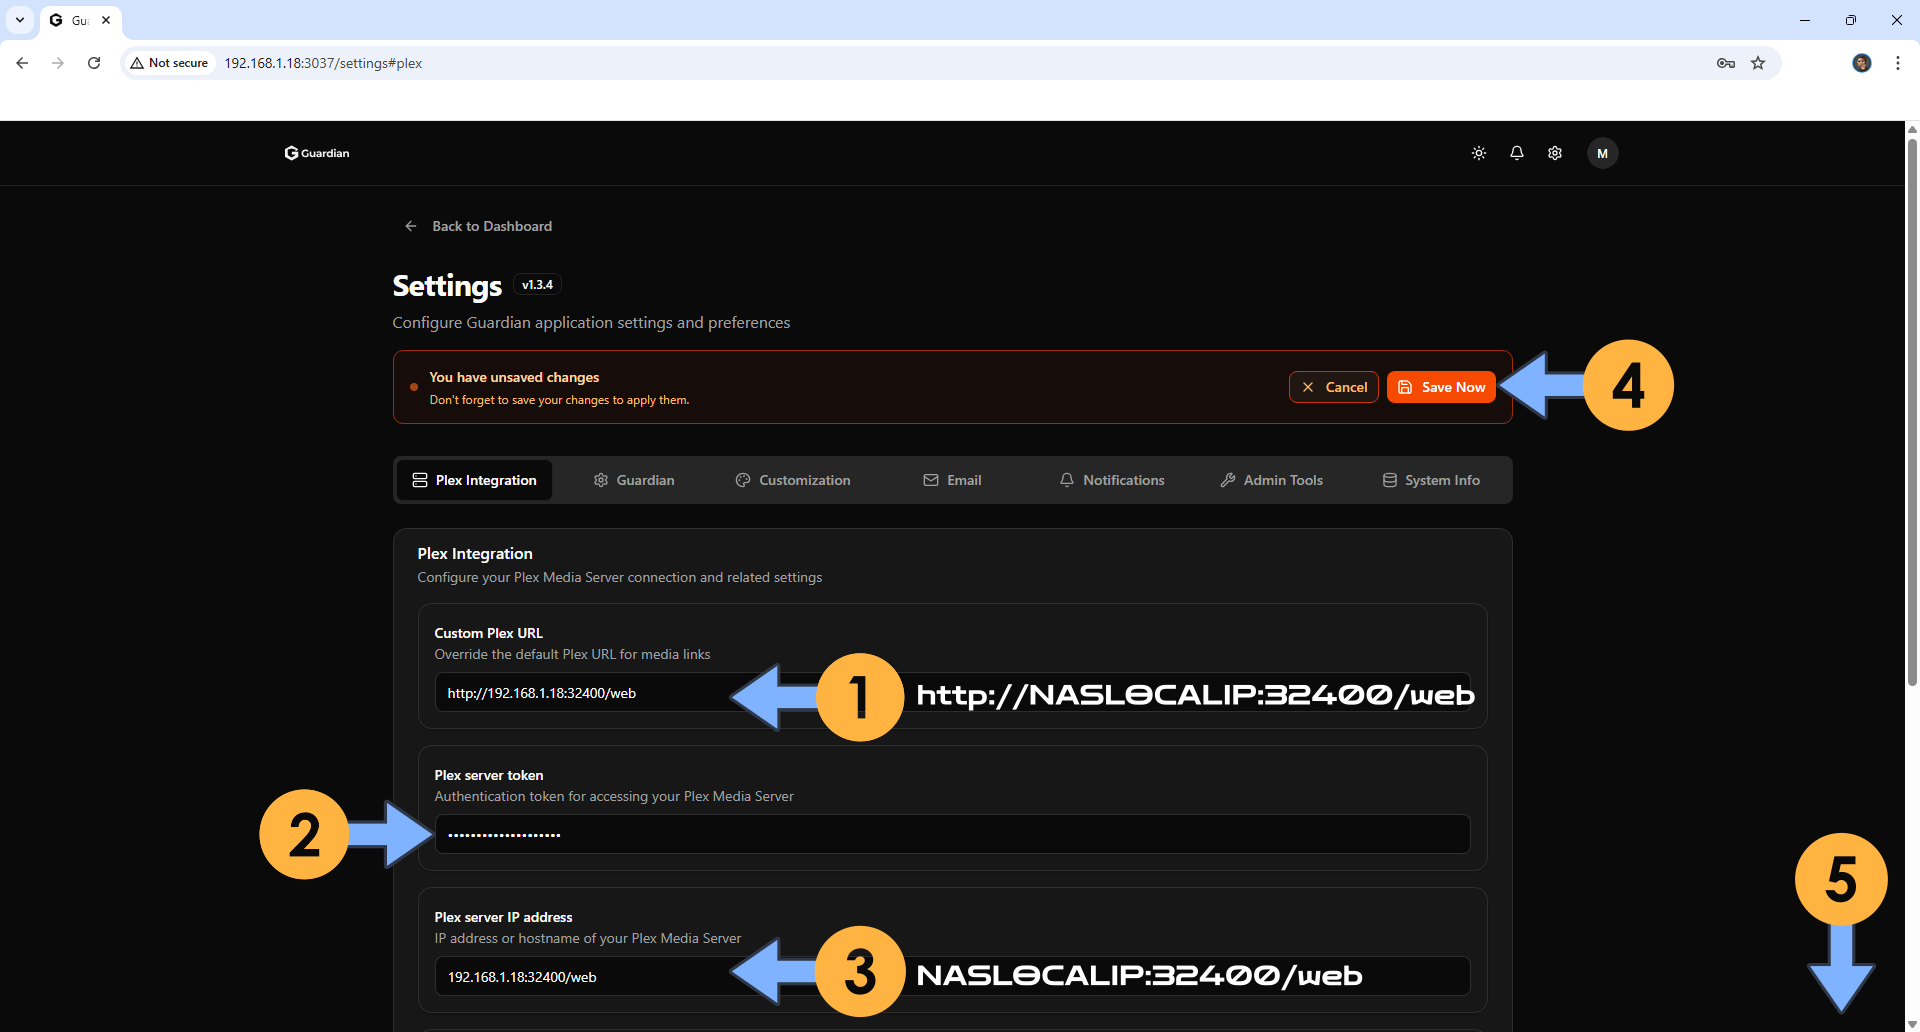
🔌 Step 5: Connect Guardian to Your Plex Server
- In the settings page, fill in the following:
- Custom Plex URL: http://[YOUR_SYNOLOGY_IP]:32400/web
- Plex server token: [paste the token from Step 1]
- Plex server IP address: [YOUR_SYNOLOGY_IP]:32400/web (without http://)
- Plex server port: 32400
- Click Save Now
- Click Test Plex Connection to verify everything works

🎉 Step 6: You’re Done!
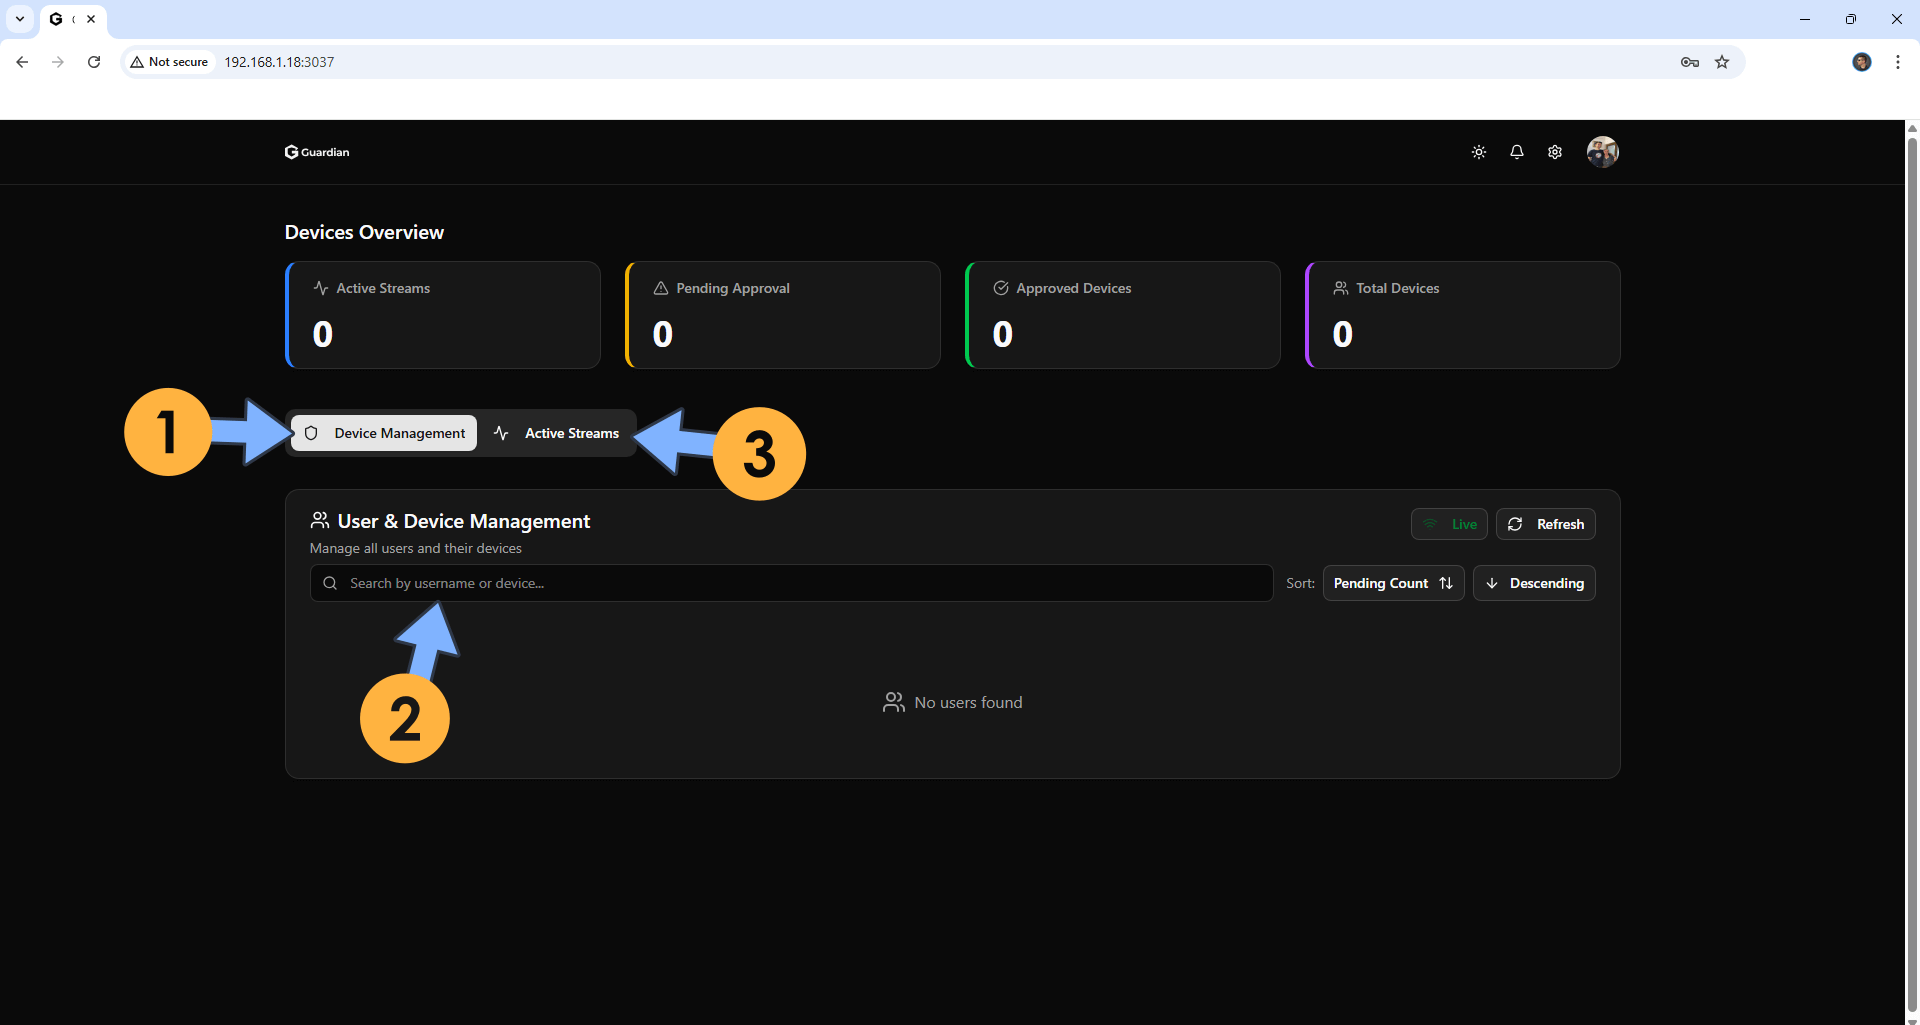
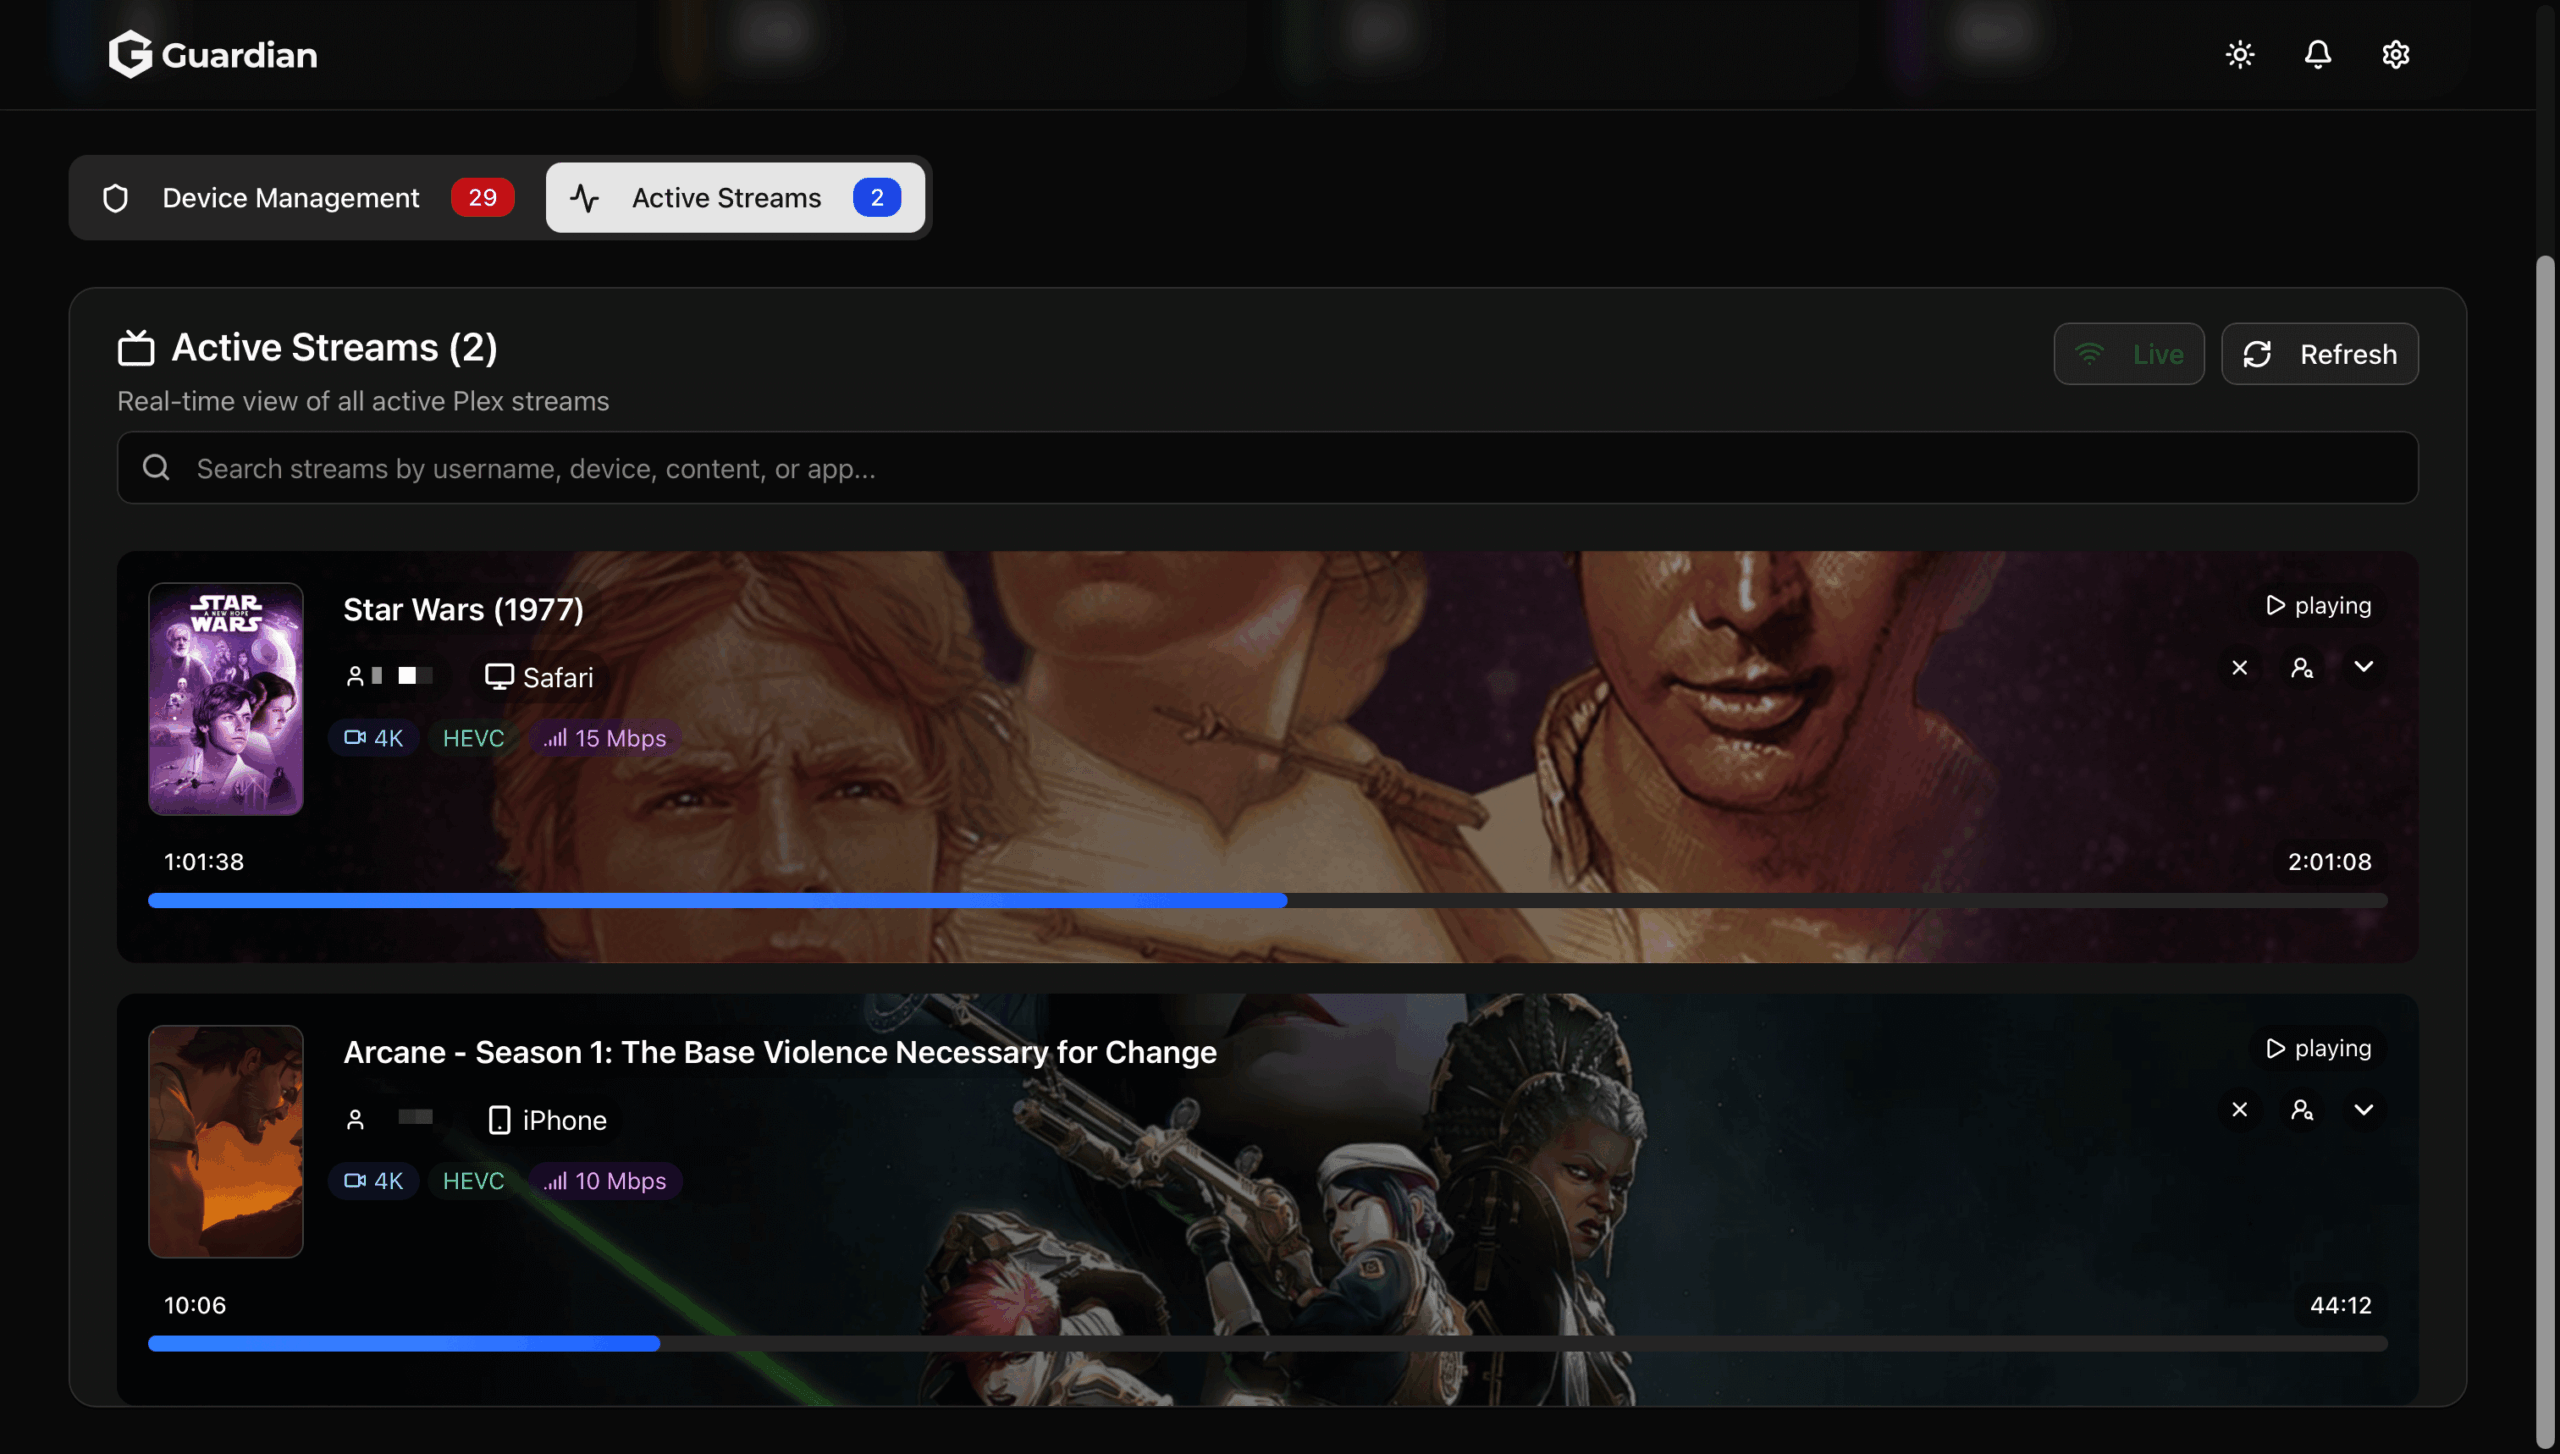
Your Guardian Synology install 2026 is now complete. You’ll see two main views:
- Device Management: Overview of all devices that have accessed your Plex server
- Active Streams: Real‑time view of what’s currently playing, with options to terminate streams
⚖️ Why Guardian Matters
Plex doesn’t give you fine‑grained control over who streams what, or when. Guardian fills that gap. You can now:
- ✅ See exactly who’s streaming in real time
- ✅ Terminate unwanted sessions with one click
- ✅ Set access policies per user or device
- ✅ Grant temporary access without sharing your Plex password
Back Up Your Guardian & Plex Configuration
Your Plex server represents hundreds of hours of curation. Don’t lose your settings, watch history, or user data. pCloud’s client‑side encryption keeps your backups private, and lifetime plans eliminate monthly fees forever.
🔒 Get 500GB Free – pCloud Encryption🔧 Troubleshooting Common Issues
Check that the container is running in Portainer. Also verify your firewall settings – port 3037 must be open on your NAS and router if accessing remotely. For local access, ensure you’re using the correct IP address.
Double‑check your Plex token – it’s the most common issue. Also verify that your Plex server is running and accessible at the IP address you provided. Try accessing http://[YOUR_IP]:32400/web directly in your browser to confirm.
Make sure your Plex token has admin privileges. The token from the web interface (as shown in Step 1) should work, but if issues persist, try generating a new token by signing out and back into Plex.
📧 Get More Docker Tutorials & NAS Tips
Join 15,000+ readers who get weekly guides on Plex, Docker, and home cloud setups. No spam, just pure content.
Unsubscribe anytime. We respect your privacy.
Ready to Take Control of Your Plex Server?
Guardian gives you the power to manage who watches what, when. Install it today and never wonder “who’s streaming?” again.
🏆 Get Synology DS224+ – Best for Plex 🔒 Back Up with pCloudLast updated: February 22, 2026 | Tested on DSM 7.2 with Guardian v1.3.4 | This post contains Amazon Associates and pCloud affiliate links – see our disclosure.